Colour Smear for Nuke
This tutorial is from http://richardfrazer.com/tools-tutorials/
Smear out the edge colour of your A plate to create better soft edges. Works by blurring and un-premultiplying your image.
I have seen different artists do similar techniques in a number of ways, but this is my take on it (the EdgeExtend gizmo is a simpler version – this one combines the edge erosion aspect and produces softer results). This technique is not application specific, but I am demonstrating it here in Nuke (although I doubt you could do this in After Effects as you need to be able to manually control pre-multiplication).
THE PROBLEM
If you have to roto something with a soft edge and composite it over a new background, a common problem is that the colour from the original background will bleed through. You see this as colour fringing around edges where there is heavy blurring, and the new / old background have very different colour values. The blurring in the plate means that your subject has been effectively premultiplied over the original background, and no matter how accurate your roto matte is it will not allow you to accurately unpremultiply it. If your subject were against a background with a consistent colour (such as a greenscreen) then there are ways to despill the colour, but if not then you need a different approach. This technique helps to re-introduce the original colour of your foreground object into these soft areas, whilst maintaining the desired softness of the matte.
Take the example above, where our A plate is quite defocussed. We want to retain the softness of the edges caused by the defocus, but in doing so the original background bleeds through. In the comp you can see a distinct bright halo around the A plate, as well as details such as the lights around the subjects left ear / shoulder.
THE SOLUTION
What we need to do is fill those areas of soft edge with a colour that closely matches the foreground of our A plate.
There are two stages to the fix – generating the fill colour and then matting it back over our edges.
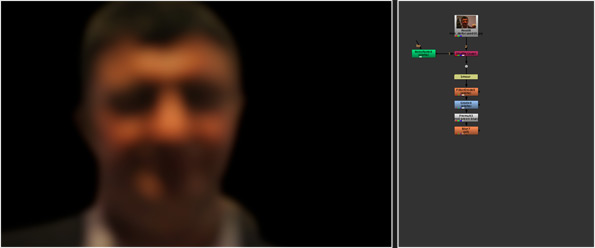
Stage 1. To generate the fill colour, first of all we premultiply our A plate so that we can see it against a black background. Here its easy to see the background bleed in our edges.
We then erode the alpha to the point where we cant see any of the background bleed. At this stage you might want to increase the contrast of your alpha channel to give it a more distinct (and less soft) edge.
Next we blur the image and then unpremultiply it. The amount to blur will depend on how far we need to stretch the colour fill out – you want to only blur as much as is needed to fill your gaps. This is the colour “smear” I refer to in the title.
Finally I just apply a small overall blur to soften the hard edges we end up with.
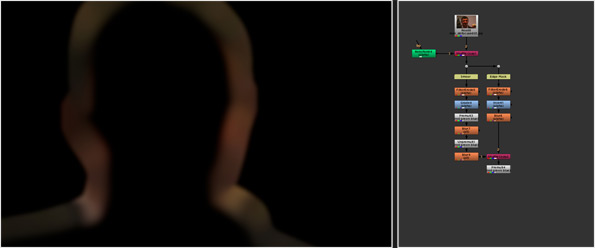
Stage 2. Next we need to create our mask for how the smeared colour will be applied back over our edges.
Let’s branch off our original alpha channel and erode it .
Next we invert the alpha and blur it slightly.
We then shuffle this alpha into our smeared colour image and premultiply it. You can see that this creates the effect of only applying the smeared colour at the edges.
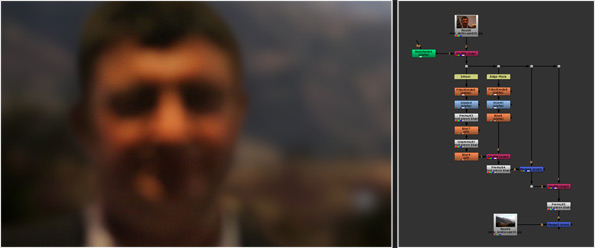
This is then merged over our original premultiplied image.
Finally we shuffle our original alpha back into the merged image and premultiply it.
This can then continue on to be merged over our B plate. When we are viewing this comp, it’s now a good time to go back and tweak your previous settings. The trick is to only bring your smear colour back by the minimum amount needed – dont intrude too far into your image or you will lose details.
When we do a side-by-side comparison you can see that the alpha retains the correct amount of softness, but with our treated edges none of the original background bleeds through.
ADDITIONAL CONSIDERATIONS
With this setup, the smeared colour is masked back over by a consistent amount all the way around the edges. This works well if your subject has consistently soft edges (such as in a defocussed image) but if its motion blur you are trying to eliminate then this might not be the best way.
Here we have an image where the subject is motion blurred. You can see that the fast moving areas around the bottom of the plate have larger amounts of blur and so will need treatment, but the top of the image has very little blur.
In this case I create the edge mask by merging our original alpha channel with itself using the “XOR” mode – this creates an edge matte that isolates only the areas from the A plate that have partially opaque values.
An extra points to note – if the edges of your A plate have dramatic changes in colour / brightness they will bleed into each other when blurred creating noticeable artefacts. Be careful to only blur by the minimum amount needed in these areas.
In the example above you can that where the black t-shirt sleeve meets the arm, the colour of the skin has bled into the black of the t-shirt. I’ve added a mask input to my Nuke node which allows you to isolate these types of areas and leave them unaffected.
WIRE / MARKER REMOVALS
This technique is also very handy for quick tracking marker / wire removals. If your wires / tracking markers are against an inconsistent but generally texture-less background (such as an unevenly lit greenscreen or a sky) then you would usually patch them or clone them out – both of which can be time consuming.
With the example above I just threw a quick roto shape around the wires / birds and with a couple of tweaks to the settings got some impressive results. There are obviously some blurry artifacts created that will need to be fixed, but it gets us the majority of the way there for just a few minutes work.
VERSION 2.0 – RESTORE DETAIL
I came across this thread on Reddit discussing the tool, and user Owen Jackson made a great suggestion for a method to restore detail.
Let’s say you are using this technique on something like hair, where your edges will have a lot of the background bleed through but also contain a lot of texture.
When we use our smear tool, we eliminate the background colours coming through, but because of the blurriness of the smear, we have ended up with an unnatural looking softness and lack of texture.
I branch off our original plate, blur it by a small amount and then divide it by itself using a Merge node. The end result is similar to applying a High Pass filter.
In fact this next step is the same principle as Frquency Separation in Photoshop. I desaturate the image and then multiply it back over the edges. This restores the high frequency detail from our original hair texture.
THE NUKE NODE

I’ve wrapped up the processes described above into a gizmo. Here is the GitHub link for the node - just select the text, copy it then, then paste it into Nuke.
All images are taken from Flickr and used under the Creative Commons licence.
 - over 1,000 free tools for The Foundry's Nuke


Comments
Can you share the project files ?
Thanks again
can i use this node for nukex v6.3
thanks again..
This is an awesome Gizmo !
But from my Experience with these Color Smear Technique, it works really nice with a Black Foreground with a White Background bleeding that it's white. But I don't get nice results with a White Foreground and Black Background, bleeding it's black. Does anyone experience this ? Thanks !
Where do I put this node and what does the OMIT pipe do. Sorry still a noob.
Also when I load up the scene again with this node in it. It gives an error and doesn't recognize the node removing all the settings.
Hug.
https://raw.githubusercontent.com/RichFrazer/colour-smear-for-Nuke/master/colour-smear.nk
RSS feed for comments to this post