Comp QC Toolset/Group to help assist you in passing the tech QC stage of a compositing shot.
fxT_compQC
First submitted: 18 September 2023
Updated: 21 September 2023
Author: Tor Andreassen
Compatible Nuke versions: 12.1 or later
Compatibility: Linux, Mac, Windows
fxT_compQC v1.2
Comp QC Toolset/Group to help assist you in passing the tech QC stage of a compositing shot.
This tool has been production tested over many high-end productions. Hopefully, it can assist you with the tech phase of your shots as well.
Keep in mind, that this tool does not fix any QC problems, it simply visualizes various QC problems for you and assists you in seeing them before your supervisor or lead points it out.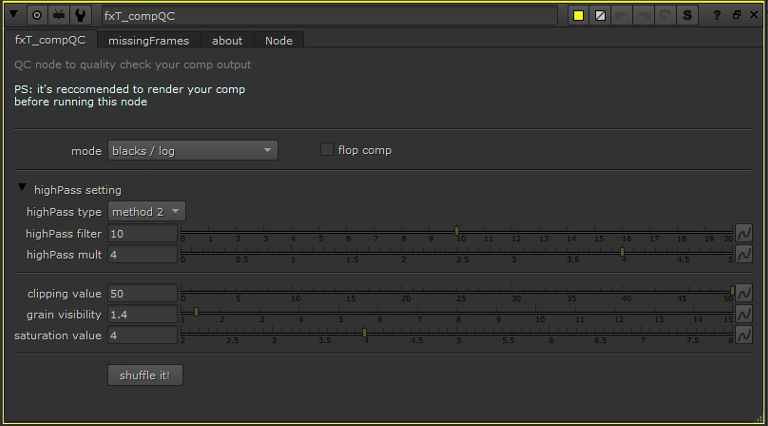
Dropdown to check QC for:
- viewing comp in Log colorspace
- nan/inf pixels
- highpass filter for comp
- highpass filter for plate
- clipping pixels
- negative values
- grain check
- comp difference with plate
Tool had a dropdown with QC modes, and the option to shuffle the channels to compare between various QC modes. It also includes a button to check for missing frames, and a checkbox to flop the comp. (See explanation below)
ChangeLog:
v1.0 - initial version
v1.1 - minor fix to the display of the negative values when choosing to view the values over the comp input.
v1.2 - minor updates to the UI, toolTip's
Feature Demo/Explanation:
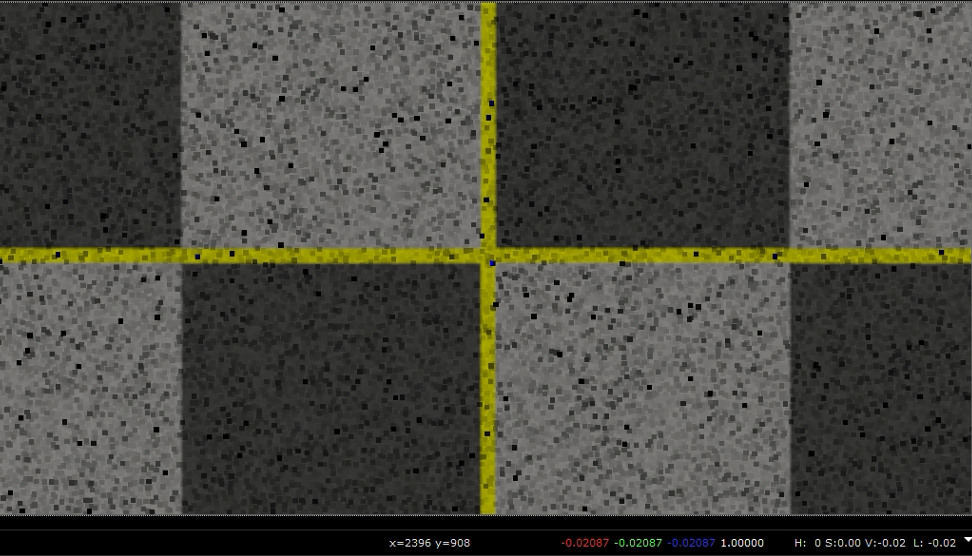
PS: Displayed with a checkerboard for the demo, this will all make more sense when used on an actual composite.
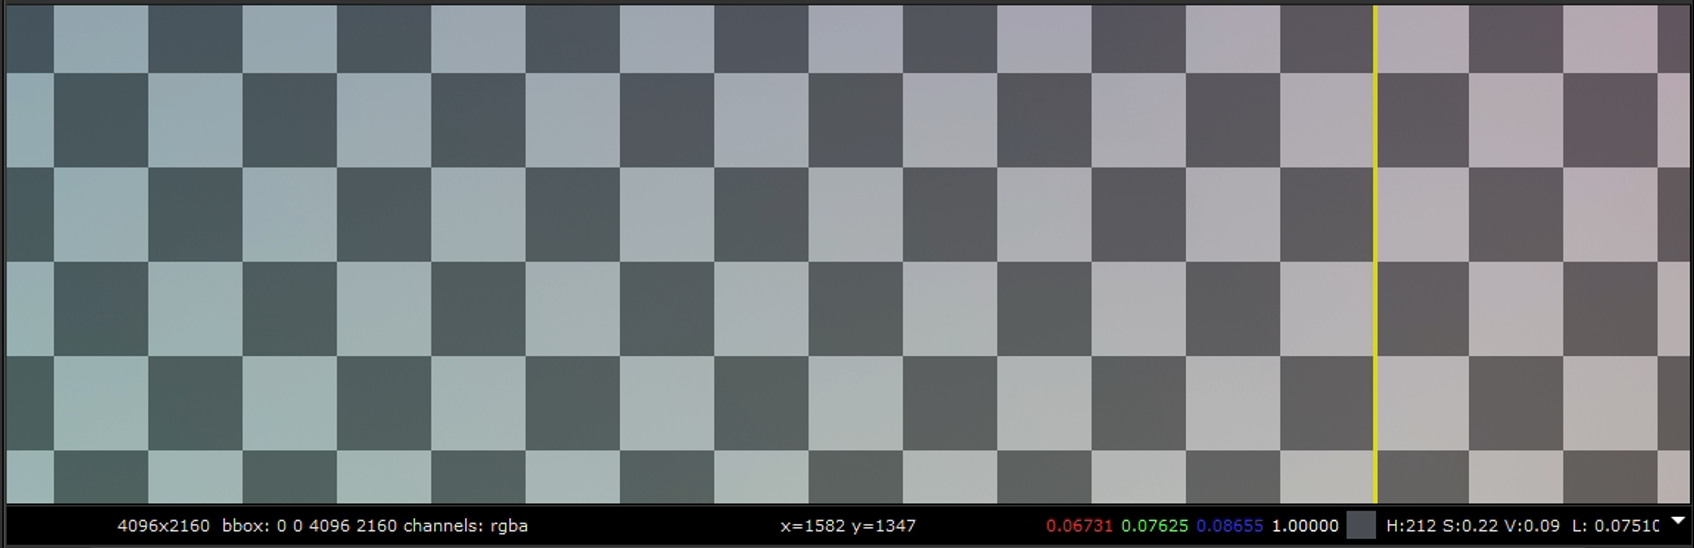
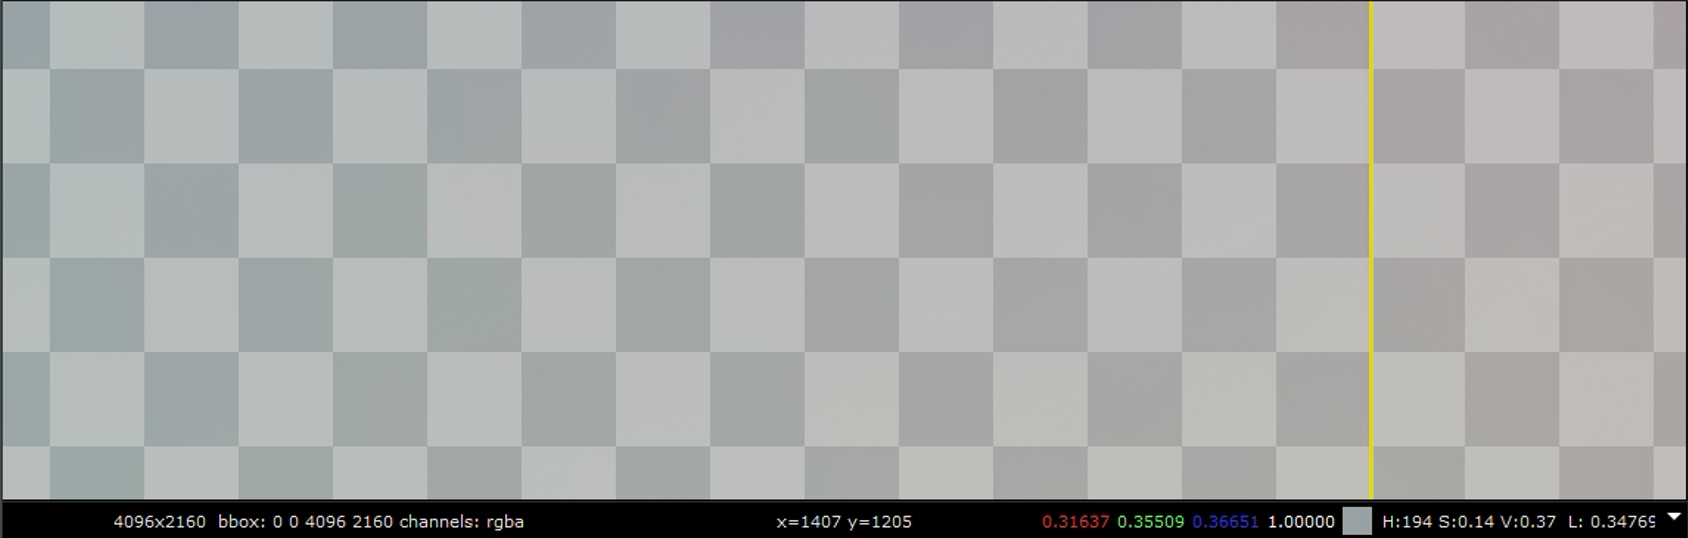
Original VS Log Colorspace
Viewing the comp in log colorspace can help you see for example if the black levels are right in the comp.
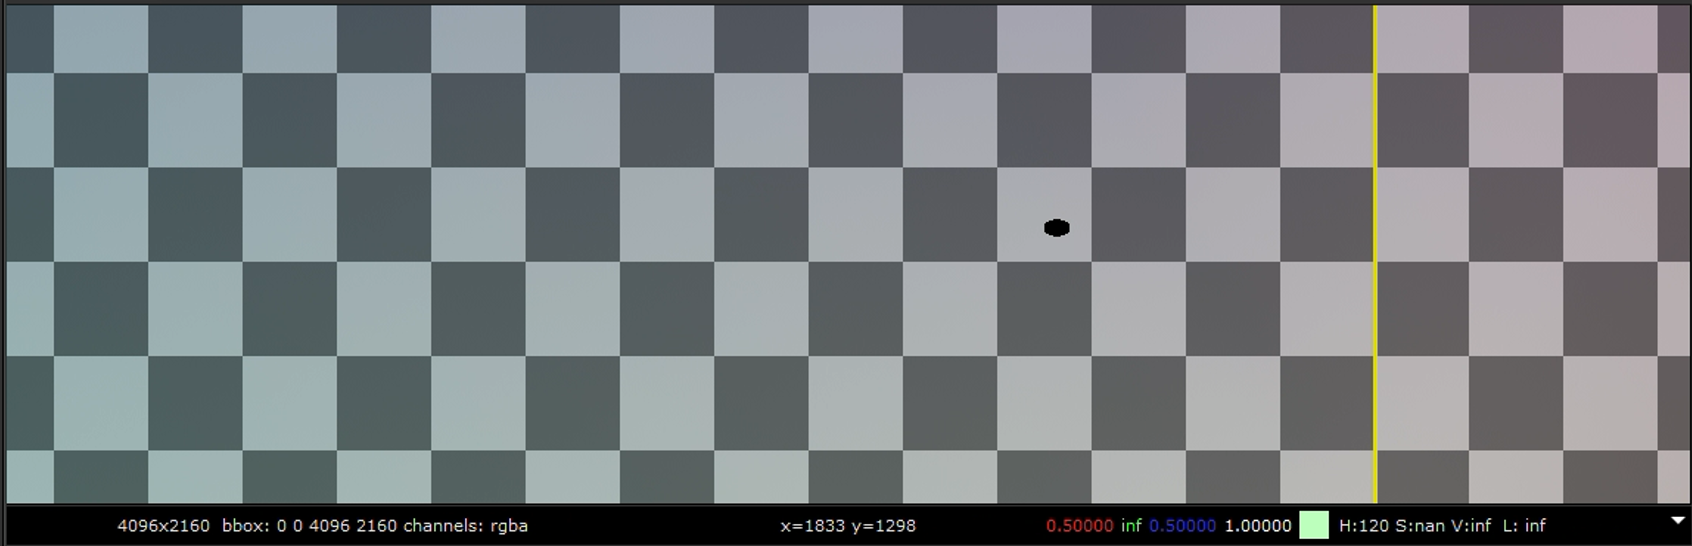
Original VS NaN and Inf Pixels QC Mode:
If there are Nan or Inf pixels in any of the channels (RGBA), this tool will take the pixel and erode it to show a large cyan checkerboard where the NaN or Inf pixel exists in the comp.
NaN's or Inf's are hard to spot with the naked eye, this makes it visually easy to see if there are any of these pixels in your composite.

HighPass Mode:
This tool includes 3 highpass mode variations to pick from (each plate/comp is different and one mode might work better than the other)
The default mode usually works well. The modes can be adjusted with sliders to fit the footage.
If you are checking the highPass on the plate and forgot to input the plate, the tool will notify you.
There is a highpass mode for the comp input and one for the plate. This helps you show the original plate vs. the comp output. Highpass can be used for many things, one of them is helping see an error in the comp that is hard to see when just looking at the comp itself. A slowly drifting roto matte is one example that is easier to see in highPass mode.
Clipping Values Mode:
Values over 50 will show a red/green pattern in this mode. Usually, the camera the plate was shot at will clip at 50 (depending on the camera manufacturer). The clipping value is by default set to 50, this value can be changed in the node properties panel if you need to.
See below for an example of how it looks when pixels are clipping (before/after). PS, this mode exposes down the comp a bit to make it easier to view bright pixels.
![]() .
. ![]()
Saturation Mode:
This tool has a slider for saturation, which lets you boost the saturation and view the comp in high saturation mode to see if the saturation of the comp element works with the plate saturation. The default value is set to 4, adjust as needed.
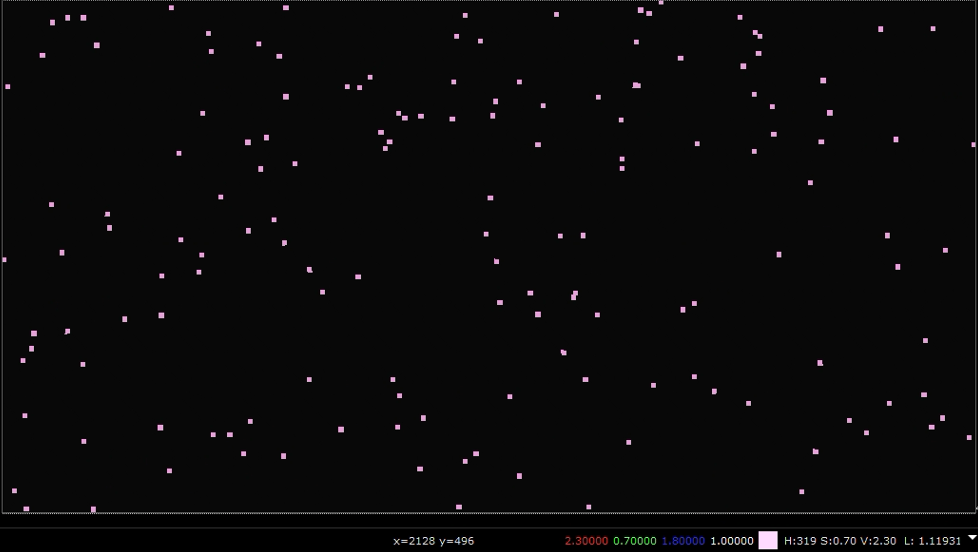
Negative Values Mode:
Negative values in the comp will be displayed as pink pixel values over black.
Below you can see the original comp vs. the QC mode showing the negative values as pink pixel values.
PS: Negative values are not always a QC issue (check the plate to see if negative values exist in the plate or if it was introduced in the comp process).
There is also an option to view the negative values over the comp input (the option becomes available when the negative values mode is chosen in the drop-down menu). See the gif below demonstrating it: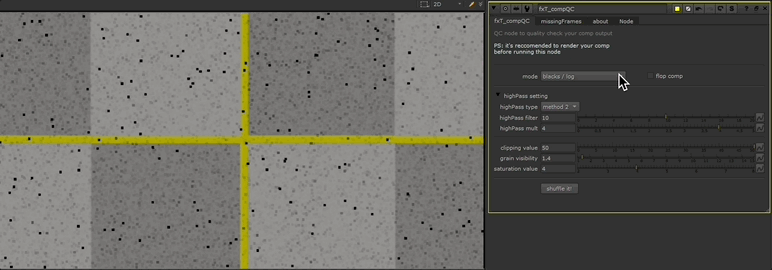
Grain Check Mode:
This QC mode visualizes where there is grain and where grain is missing. Simply explained; this is a difference between a blurred version of the comp and the regular version of the comp. You will see a consistent noise pattern where grain was added. if the grain is missing in any area, this noise pattern will be missing, consider this an area to look into if the grain was applied correctly. The grain visibility (how easily you see the grain, can be adjusted in the nodes properties panel)
the gif below shows how it's looking in areas that are missing grain. 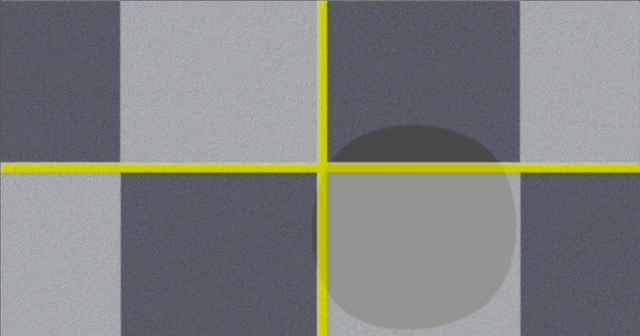
Comp difference with Plate Mode:
This is a difference between the plate input and the comp input. It shows the places where you've made changes from the original plate.
Keep in mind, that grading to the plate will also show up as a difference. It serves as an easy way to see where ANY change was made.
In case the change was not intended, this QC mode with showcase it easily.
Flop the comp:
This tool includes a checkbox to flop the comp. Seeing the output in a different way than what you're used to, might help you catch things you didn't see when you were looking at it the usual way (one tends to get blind to things one sees over and over again, this is a helper to double-check the work in a different view).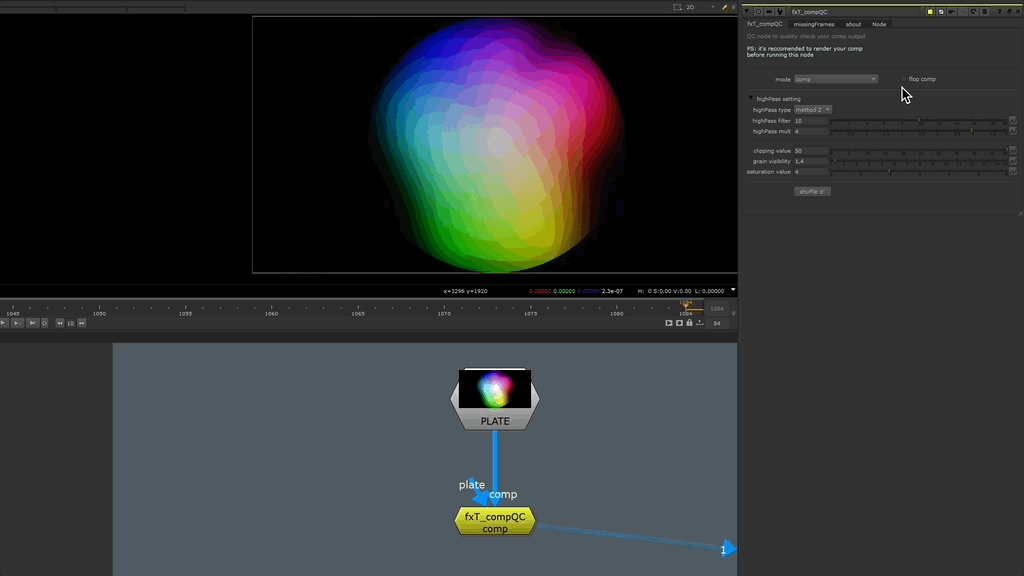
Shuffle Modes:
In addition to the dropdown menu for QC modes, this tool has a button that lets you shuffle the modes as channels.
This feature is so that you can compare one QC mode to any one of the other QC modes by A/B'ing them in the viewer.
Check for missing frames Button:
This tool has a button that will check for missing frames. It will compare the input start and end frame, and if any frames are missing in between the start/end frame; the missing frame numbers will be listed in a text field. You can clear the field with a button as well.
It uses the project setting as first/last frame comparison to the input, meaning if the project setting was incorrect, the results would be inaccurate. If not foolproof, it's a quick automated way to check for missing frames.
PS: it does not list errored frames after a render, just if the frame range has any actual missing frames on disk.
In the gif below you can see that the input has 6 missing frames.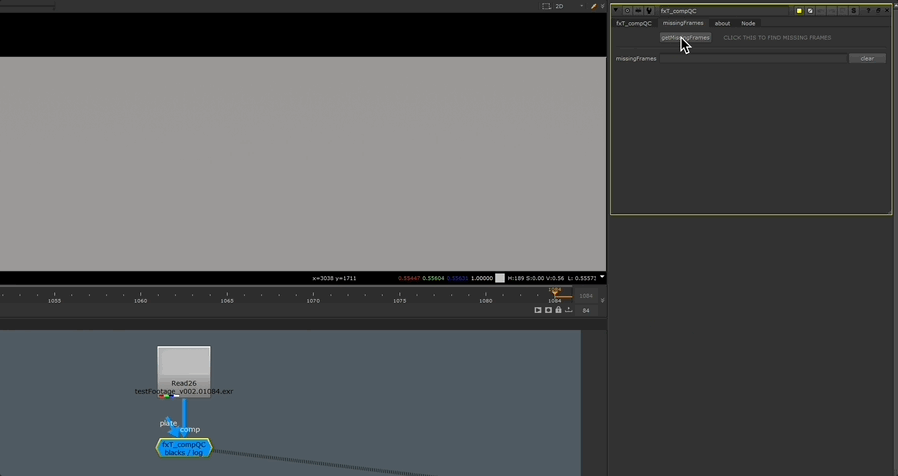
or register to download or rate.
Comments