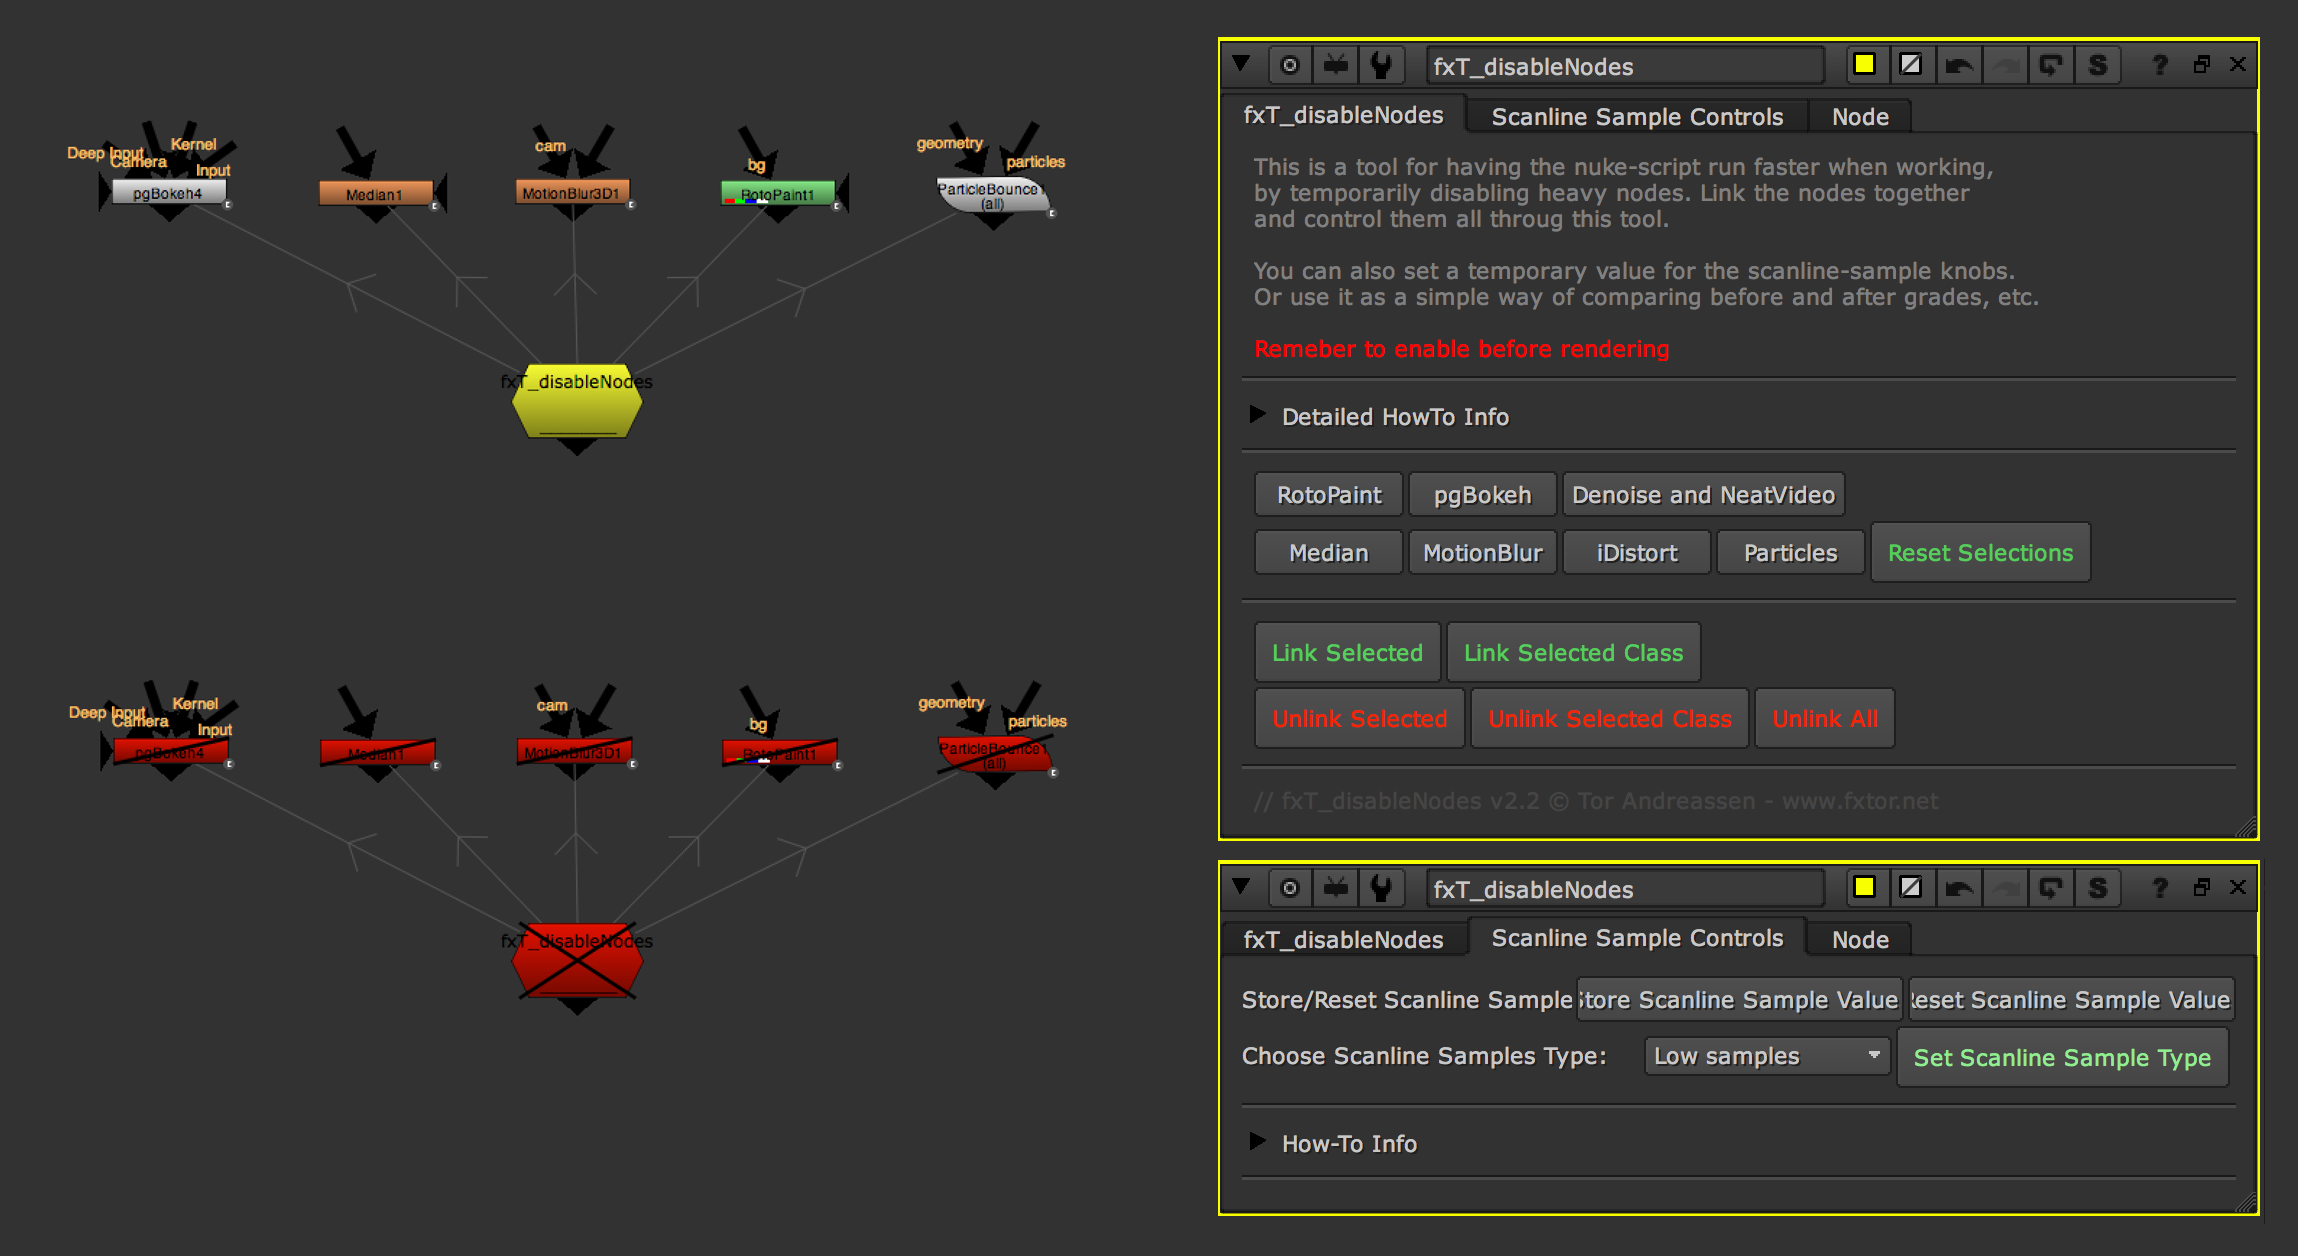
DisableNodes helps speed up your compositing workflow by disabling heavy nodes. You can select nodes you choose to disable, either by the predefined class-buttons, selected nodes or selected class, and then link them together and control the disable/enable from this tool by pressing 'd' for disable. You can also control the ScanlineRender sample values in your Nuke script. Or simply use it as a quick way of comparing before and after grade etc.
fxT_disableNodes
First submitted: 13 June 2022
Author: Tor Andreassen
Website: https://www.fxtor.net
Compatible Nuke versions: 6.0 or later
Compatibility: Linux, Mac, Windows
Useful Nukepedia Tool #9. Explore this video
fxT_disableNodes v2.3
DisableNodes helps speed up your compositing workflow by disabling heavy nodes. You can select nodes you choose to disable, either by the predefined class-buttons, selected nodes or selected class, and then link them together and control the disable/enable from this tool by pressing 'd' for disable. You can also control the ScanlineRender sample values in your Nuke script.
Or simply use it as a quick way of comparing before and after grade etc.
- Seamless integration to the Nuke Menu (including custom icon).
- Keyboard shortcut to create node (alt+d).
- Automatic and manual controls for selecting nodes and all nodes of a certain class type.
ChangeLog
version v2.3
Updated for nuke13
version v2.2
Fixed issue where the original color of the node was not kept when disabling/enabling.
For example if a Blur node had custom color, enabling or unlinking would restore the original nodecolor instead of the custom set color.
Same with groups, which would always go back to default grey color. This version keeps the original node color when disabling/enabling and unlinking. Also removed the 'enable/disable' button, as I never really used anything but the 'd' shortcut to disable the node.
version v2.1
- You can now unlink Selected Nodes and all nodes of the Selected Class
- Callbacks now make sure that the node and the linked noded turnes red when the nodes are disabled and go back to the defalt nodecolor when its enabled. This makes it easier to see what nodes are diabled, so its easier not to acidentlaly click render before remembering to enabeling the nodes, simply a visual help to remind the comper the fxT_disableNodes is in use.
- Python cleanup, for more efficient code
- User interface updates: removed some buttons for selecting noded that I rarly used, and added a pgBokeh button, update knobnames to more logic names, and updated how-to explination text and tool tips for all knobs.
version v2.0
- Tool is no longer a toolset, its changed to a gizmo. However it's open like a group, for easy access to modifying it on the fly.
- 100% python: All operations are done with python (python buttons). This makes it compatable with all versions of Nuke and all OS'es.
- Added button for selecting all nodes of a certain class (an alternative to adding more buttons of nodetypes with no dedicated button)
- Added support for storing ScanlineRender sample values. One can store the values, and set a temporary value of 1 in all your ScanlineRender nodes - to have them render faster, then when ready to render, pop back the original values by the click of a button.
- Saftey features for the scanline render samples value, you can not accedently replace the values with temp values before your custom samples values is stored.
- The node is no longer dependent on the node's name to function, this mean that you can have as many nodes as you want.
- Node selection updates: Select all nodes of a certain class by clicking a button: Denoise, Defocus, Median, Grain,
F_Regrain, all MotionBlur nodes, RotoPaint, GridWarp, SplineWarp, All paricle nodes. Or select your custom nodes by hand.
- Updated look/layout on the nodes graphical user interface .
- Better documentation for how the node works, with text in the node for explination and tool-tips with descriptive information.
Install Notes:
To install the Gizmo in it's own nuke menu with the attached menu icon: please see attached 'init.py' and 'menu.py' files.
Install the Gizmo and icon files according to the paths in the 'init.py' file, or alternetivly change these paths to your own preferred install location.
or register to download or rate.
Comments