 - over 1,000 free tools for The Foundry's Nuke
Creating VFX for Michiel de Ruyter

Introduction
In this article for today, we will see step by step way how I have created one of the iconic shots for movie The Admiral / Michiel de Ruyter. The entire shot creation took 2 weeks.
I have not been given any instructions nor boundaries by ProgressiveFX for which I have created the shot, so I could really unleash my imagination on this project. What is also very much fun, there is exactly nothing that has been captured or recorded in any way in real environment for this particular shot. All of what is in the final shot, has been created only by a computer. Even stars on the sky are created by simple noise. :-)
We will focus on compositing in this article. After all, this is Nukepedia.
I have started my work with final beauty render from 3D department. The models and all the details were handed us from our client. We have set up our scene with given models and rendered out this image.
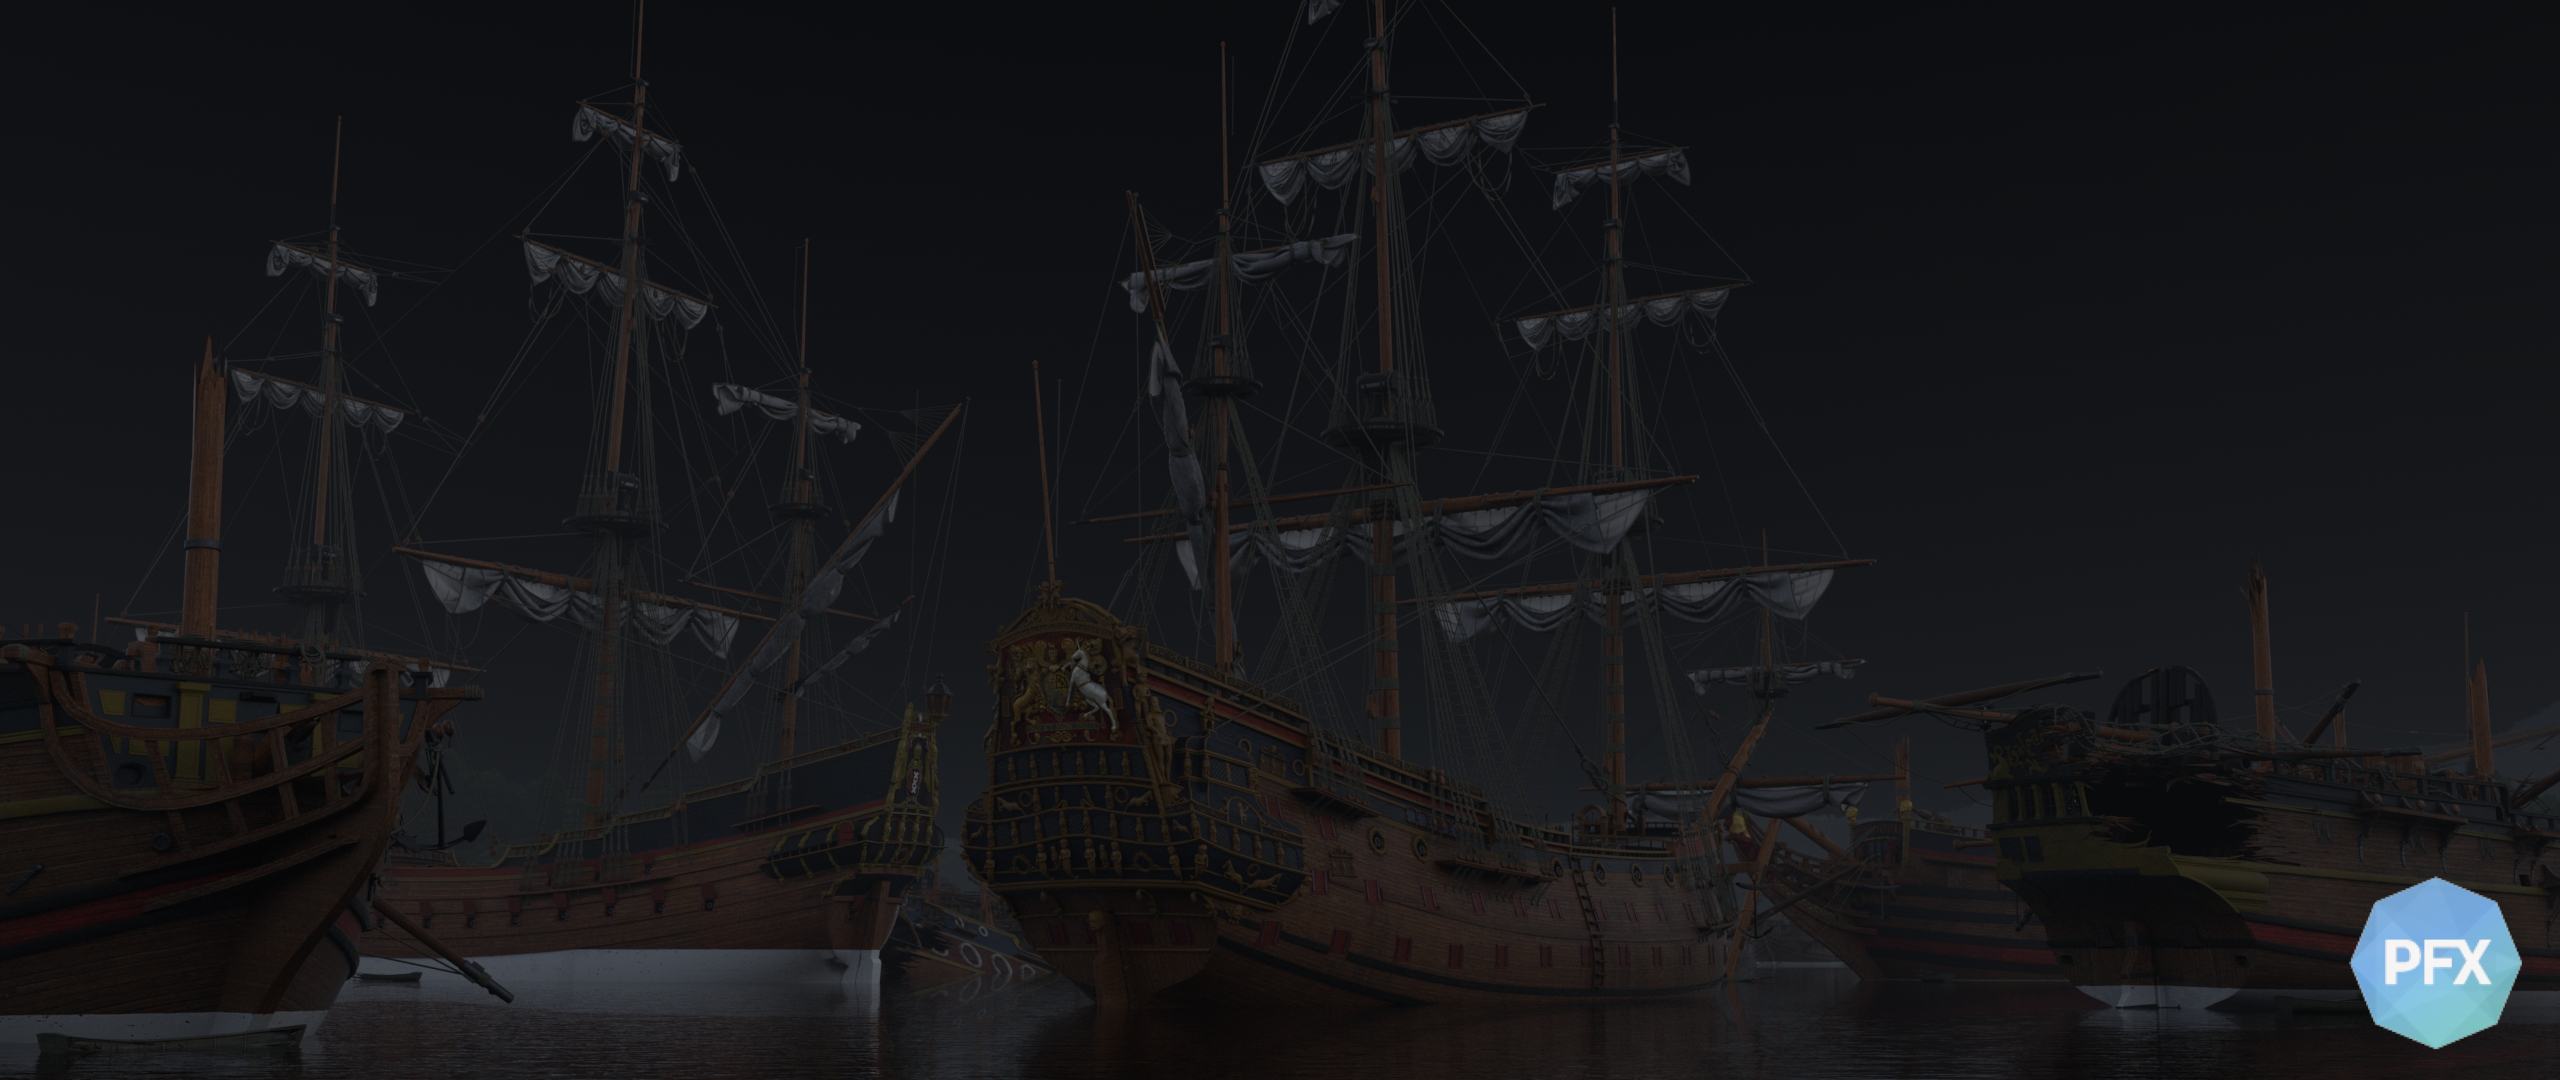
As we can see, this gives us great starting point. As night shot, everything works, there are no problems with geometry nor rendering and we are set on the right path. We don't have to clean anything so we can dive right into compositing itself. Wonderful.
Relighting
The obvious challenge is to relight the scene. Lighting this fire shot in 3D itself would be very time consuming process. This shot is perfect for later relighting in nuke, since we can tweak the light character in nuke very well. Not only it will save time on huge amount on rendering in 3D, but it gives us the ability to tune the character of the light without need to re-render the entire scene over and over again. And since there is fire everywhere in the scene, and wood is very diffuse material, we don't have to take much care of correct secondary light bounces. Direct lighting through normal pass will be more than enough for our intention.
Here are some examples of different lighting utilising original render and normal maps.

On the scene like this, the light acts chaotically. As the character of the fire changes, so changes the light it emits and that is reflected by material around it. It would be nice to relight the set dynamically, so there would be some animation in it and wouldn't look too static. For that purpose, I have used normal map and called a little function on it, that places simple noise over each colour channel. As we animate this noise, we get sort of animation that gives the shot sense of life.
We can combine typical normal map and call expression like for example
"noise(r*4,g*4,frame/100)"
in alpha channel. It is much faster then re-maping entire scene with STmap and noise raster. It's a neat trick.
There is, by the way, extensive tutorial on expression node written by Matt Estela. Great guide. (link)
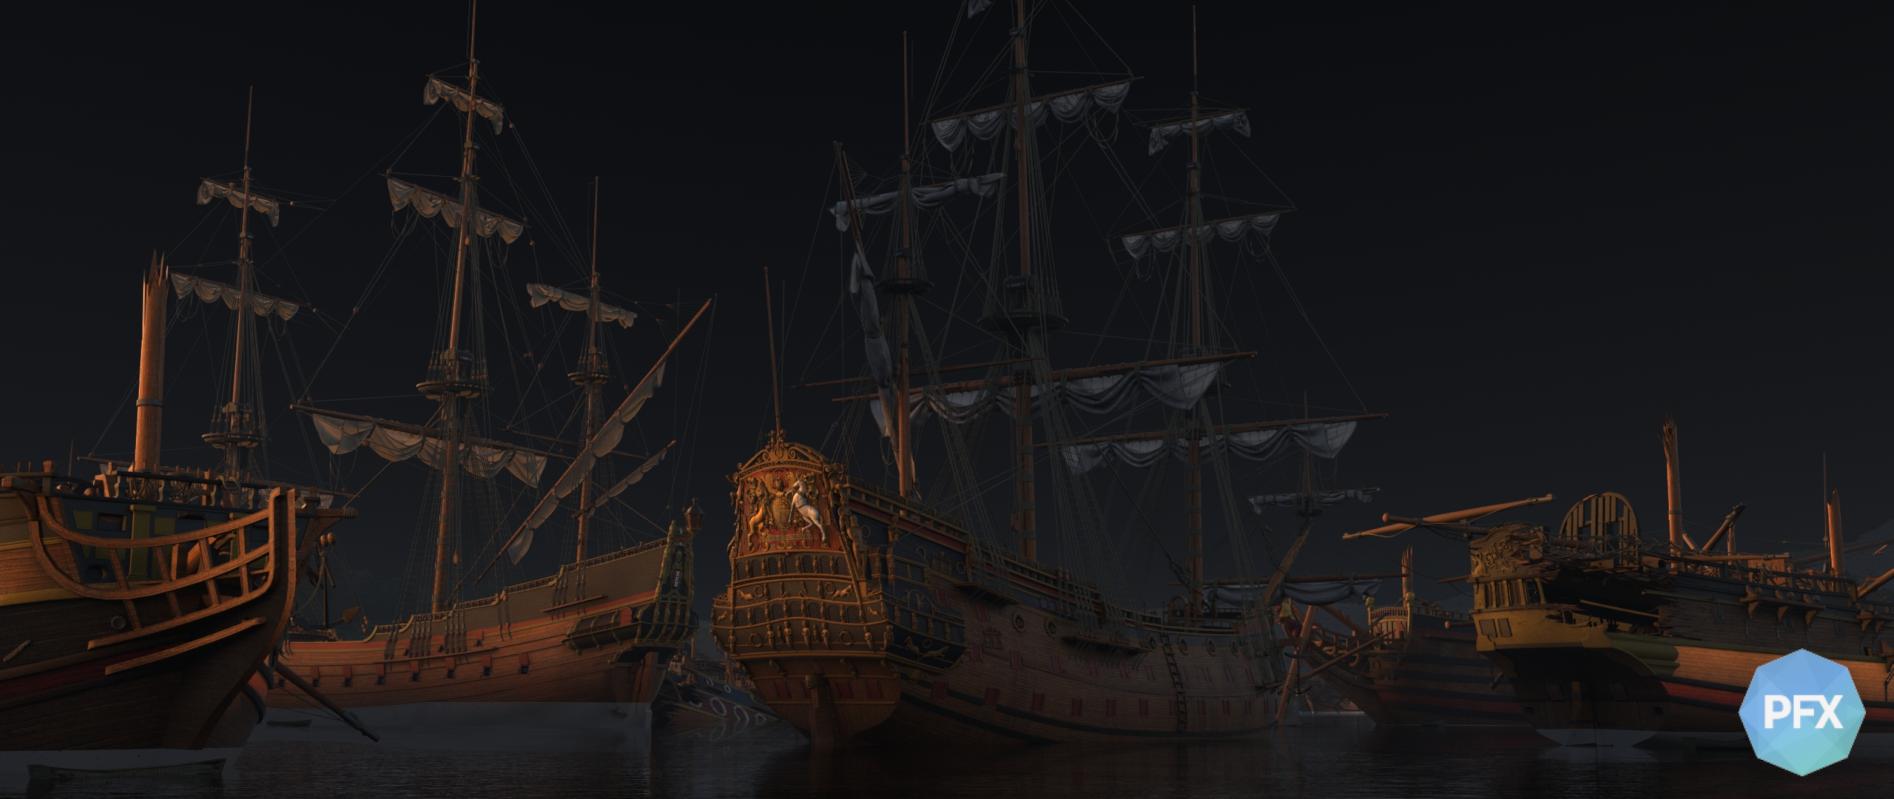
Final lighting is completely different from the original render. This is result of our work.

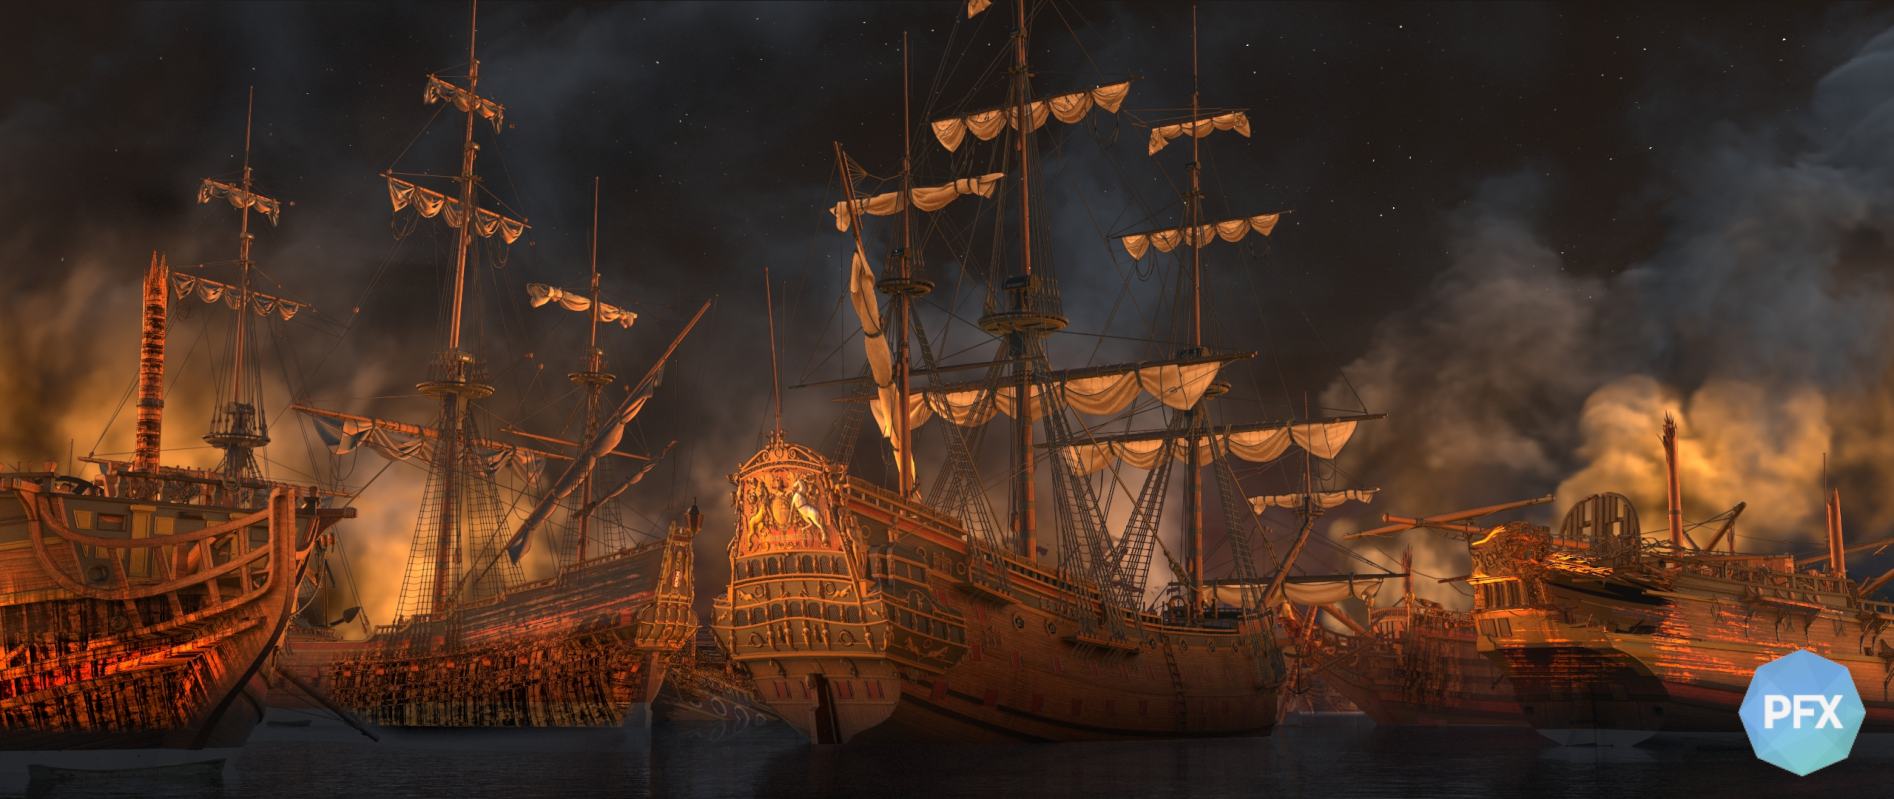
Smokes
Part of the smokes is what gives the shot all the sense of true inferno. So it is important to get them right. In reality, smokes in night are illuminated by fire itself only. In our case, there are no other light sources that would illuminate the smokes. And since camera is setting exposition time to so low values, to capture detail in the highly illuminated scene, there would not be a lot of sky visible. In fact the entire scene would look very contrasty.
The smokes used in this shot are static originally. The movement in them is added by IDistort node with simple animated noise as driver. It would be nice to relight the smokes with their own normal maps, but unfortunately we were limited by time and normal maps for the smokes were not available. The smokes were originally used in other project, and have been used in much smaller resolution. So they are scaled up and there is also some sharpening applied on them.

STMapping of burned wood
What is apparent in the render here, is that the texture of the ships simply doesn’t work with the rest of what’s going on. Since the ships are on fire, we obviously need to change texture of the ships too. There are multiple approaches to achieve this, however the easiest way would be to change the texture in nuke itself. We can save time for our matte-paint department and also save time for our 3D department, since they don’t have to re-render the shot every time somebody demands change.
By using simple UV map to STMap our burned wood texture, we can later change where the burned texture would be visible. We can also change the character of the texture etc.
V-Ray by standard can output UV maps, and this is perfect scenario for their utilisation. ST mapping procedure is very useful trick how to map some texture over some model in nuke, without need to load any geometry because ST mapping is 2D operation. It doesn't involve any actual 3D calculations. Therefor it’s also very simple to understand to average human. If you are more interested in ST mapping, I have described this procedure in more detail in previous article on fast water reflection (link)

Here you can compare the two renders, one without burning wood texture, other with it. Created just in Nuke with provided UVmap.
To further increase realism, I have added subtle gain animation over the burning wood texture too.
Fires
Fires were simulated with FumeFX in 3D Max. There is not much compositing work put into them besides setting their gain, and masking out parts where they are having contact with wood on ships themselves.
Unfortunately, they were not simulated with the geometry of the ships, since the geometry was pretty complex and we were in serious time pressure on this project. It would have been nice, if the fire would interact with the ships realistically though. Maybe it would be possible to use STmaping again with the fires, or maybe use normal map as a vector pass for IDistort. But I am just thinking loudly now.

Water reflection
Since half of our shot is water, we have to do some water reflection (haha). The waves in this shot are practically non existent, which makes our situation much easier. But to add realism, we should add some distortion over it. We could create our own distortion map with simple sinus expression. However in this shot, I got distortion map straight from 3D department - it is just a rendered displacement map. We can use this distortion map as a driver for IDistort operation. With a right pixel filter, we can achieve soft effect, which doesn’t causes much artefacts.
Due to its size and complexity of the distortion map, water reflection is the most computationally demanding part of this shot. And since the output of IDistort is based on the upper part of the shot, it was not possible to pre-render it in most cases.
Colour correction
As I got into this part, I had to make some final colour changes to this shot. Final colour correction practically buries stars, lights up the fires, add some defocus and motion blur to the fires.
I have also added sparks, which helps a little bit too.
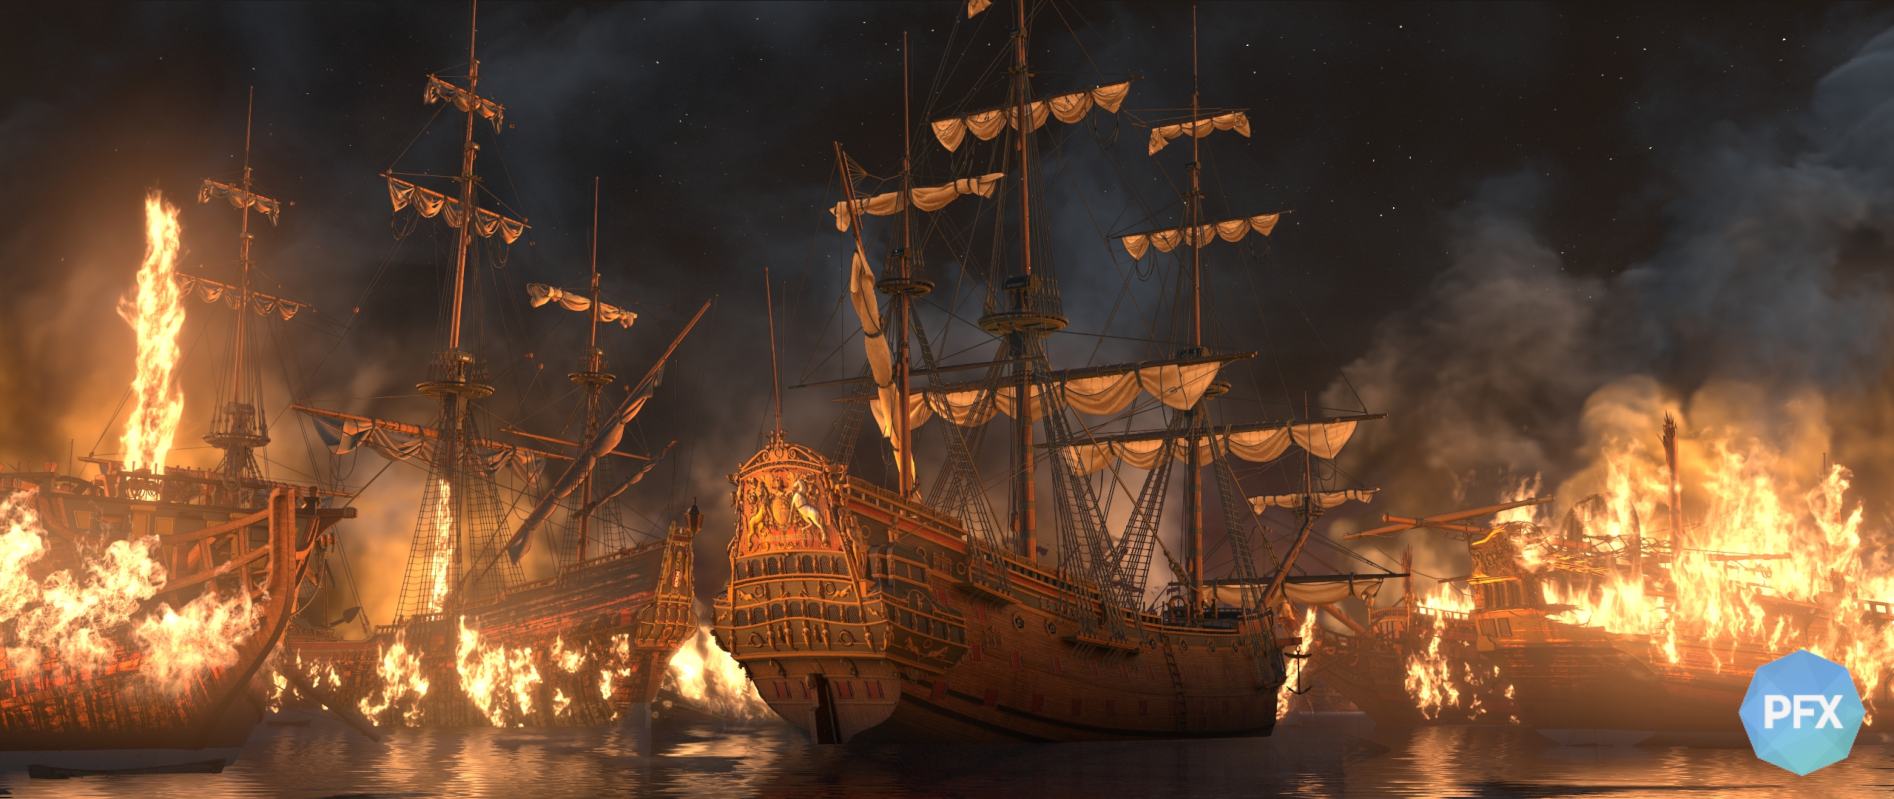
Finishing
As you can see, there are a lot of small details in final result. Sparks are flying around, the entire shot is also randomly distorting little bit due the heat coming from the fire etc. I have also worked with some silhouettes in the background to underscore the size of British navy. The true beauty of this shot comes from the fact, that it is free for your imagination. There is always something you can do better. Our client was after all happy with the result. It was a real pleasure to work on this.
Comments
RSS feed for comments to this post