Non-destructive clean-up work using difference grain & color stabilization technique
In this short tutorial I will share my clean-up technique/approach that I use on a daily basis.
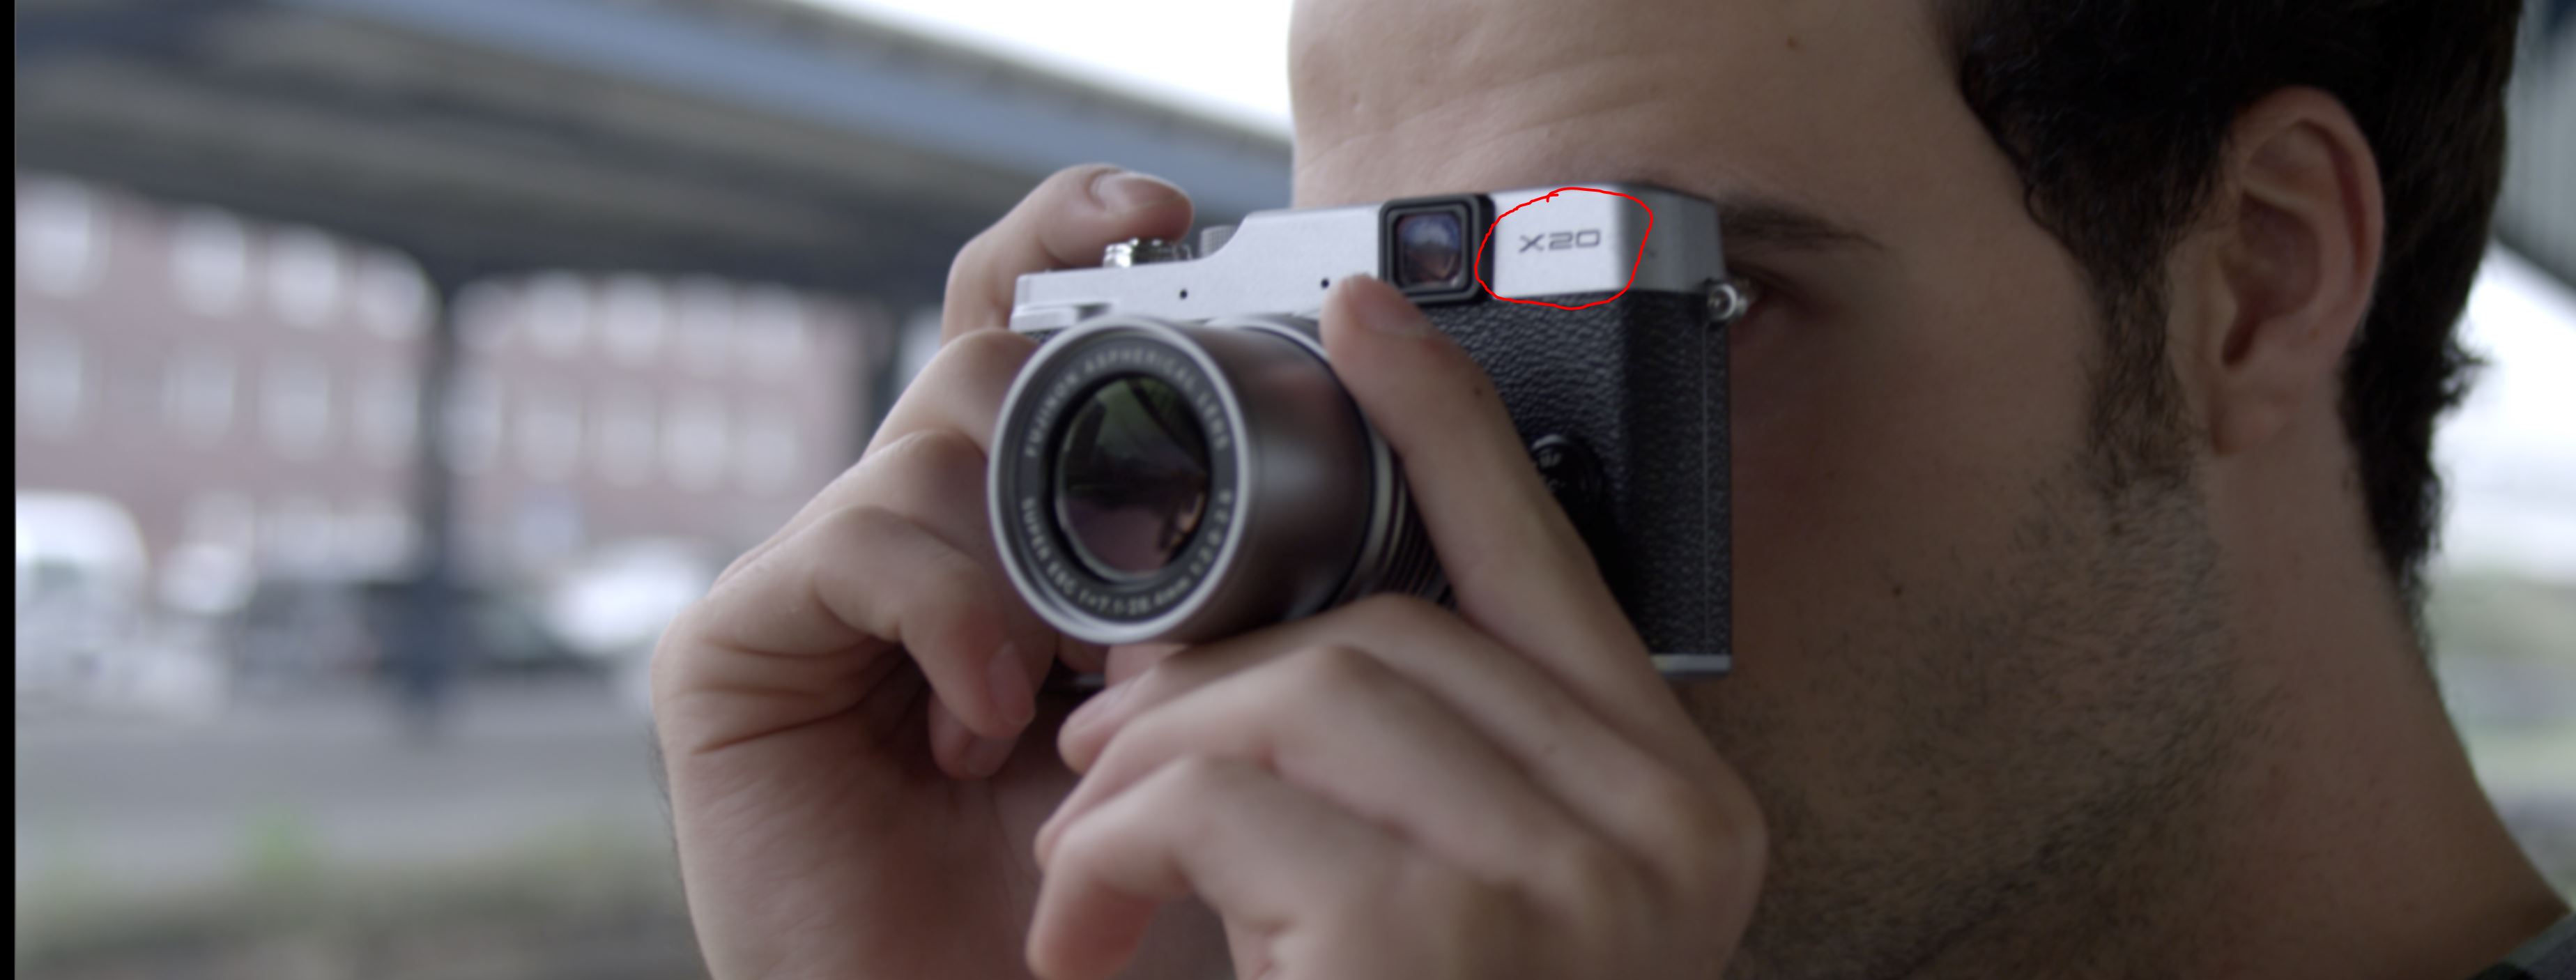
We will do a simple clean-up work – removing a “X20” sign from the camera.
Ideally you would want to affect only your clean-patch and not affect original plate in any way. Original grain, color and luma values need to be the same, pixel to pixel.
We start our comp with the de-noising process.
First we going to convert our footage from linear to log using Log2Line node (use Lin2Log operation) and then we will apply “Denoise” node. Denoising converted to log footage will give us less artifacts and more constant results. After we’re done, let’s convert our footage back to linear by applying same Lin2Log node (this time using Log2Lin operation).
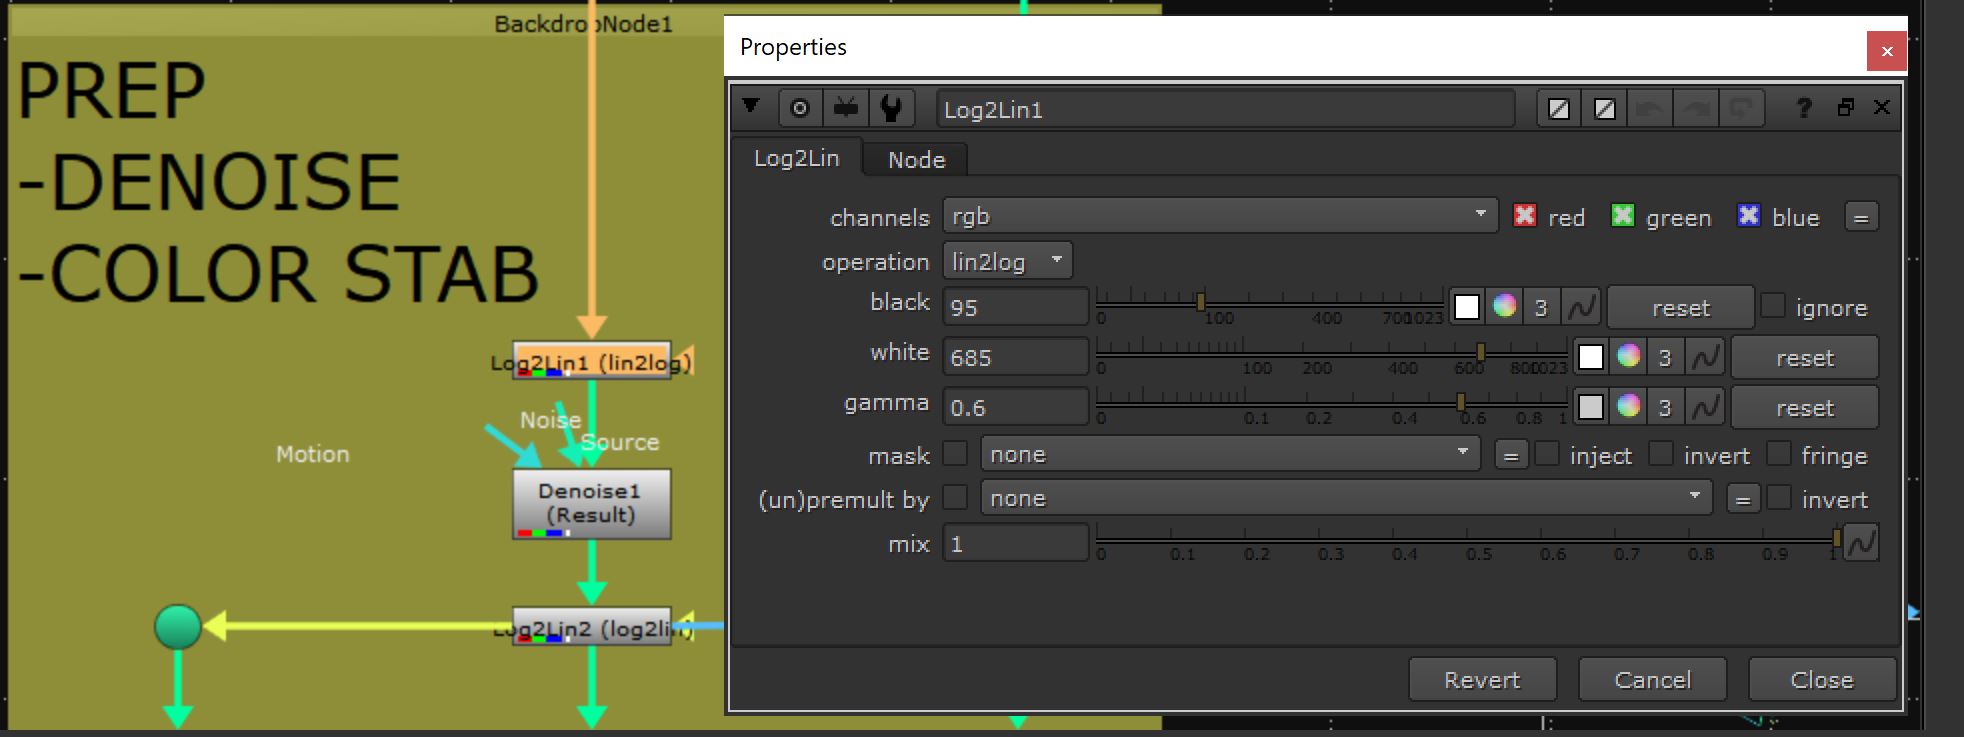
(pic 1)
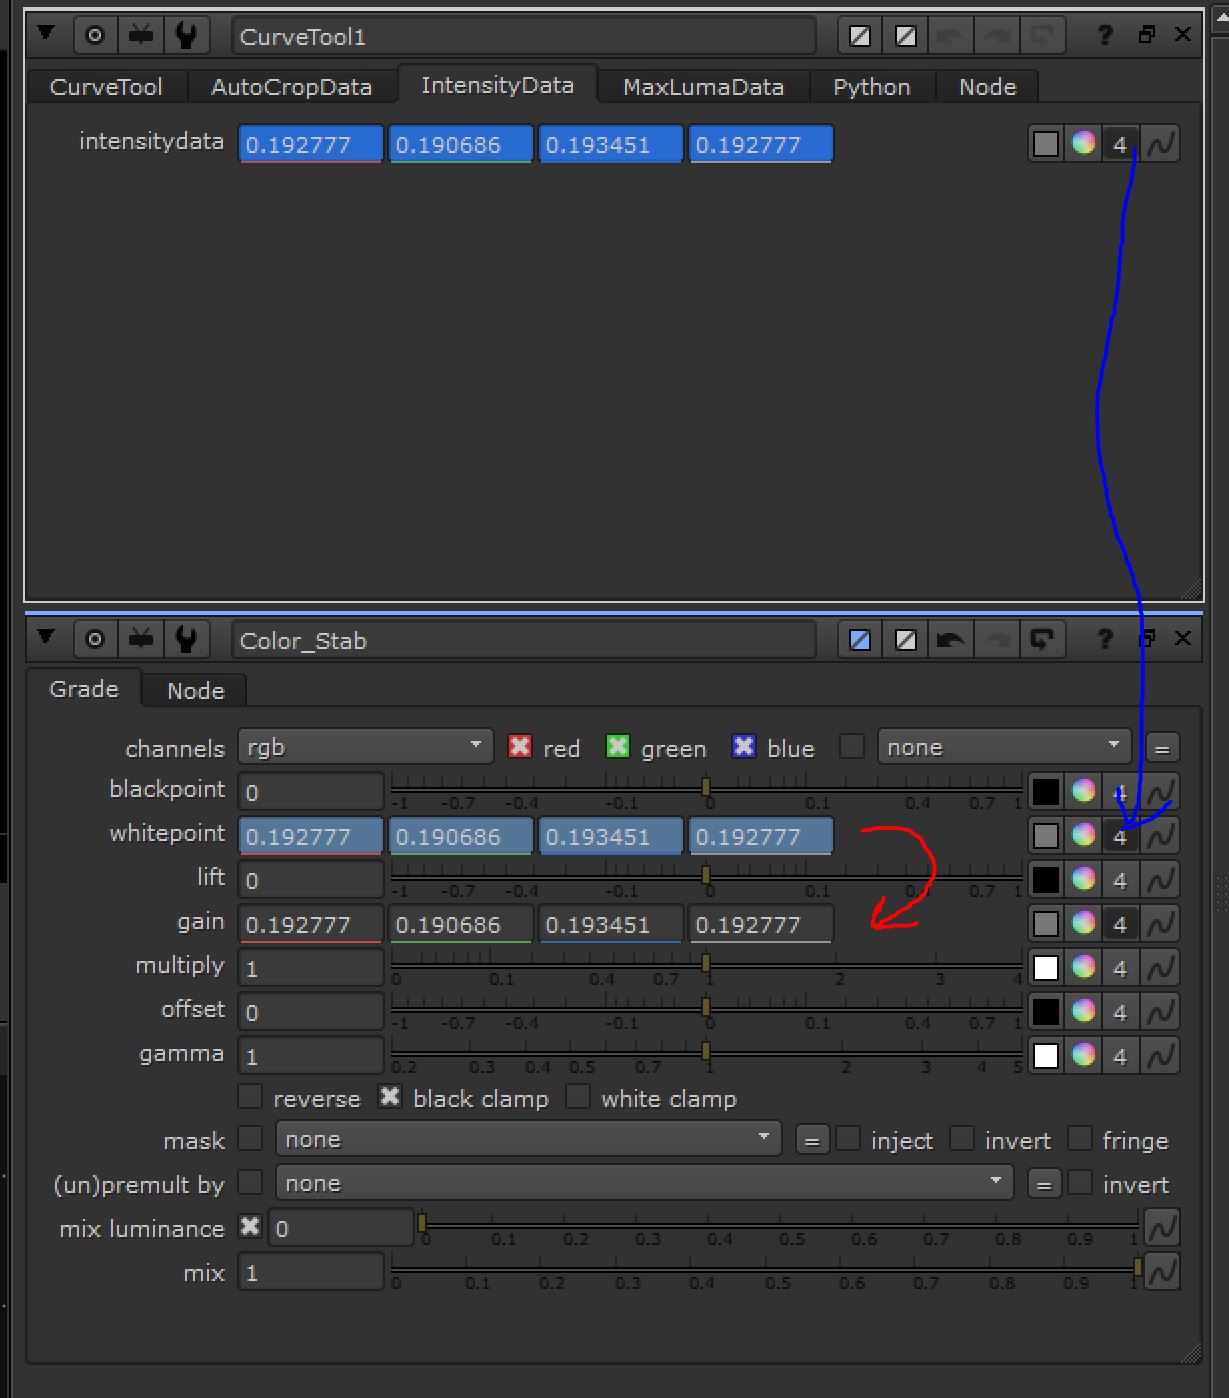
As the light source is changing, our plate will have some color shifts so our next step is to “lock” our color values.
We will use CurveTool for that.
After we got our intensity data, let’s create a Grade node and place it after your Denoise set-up. Let’s link intensity data (animation) to whitepoint and then copy single frame values of your whitepoint to your Gain value. Now our footage is normalized and we won’t have any color shifts. This is an optional step, if your footage has no color value change, you can skip it.
(pic 2)
Now let’s move to tracking. I will track this footage in Mocha, but before that I’m going to do a little prep work to help Mocha out (just a slight boost to contrast, saturation and some sharpening).
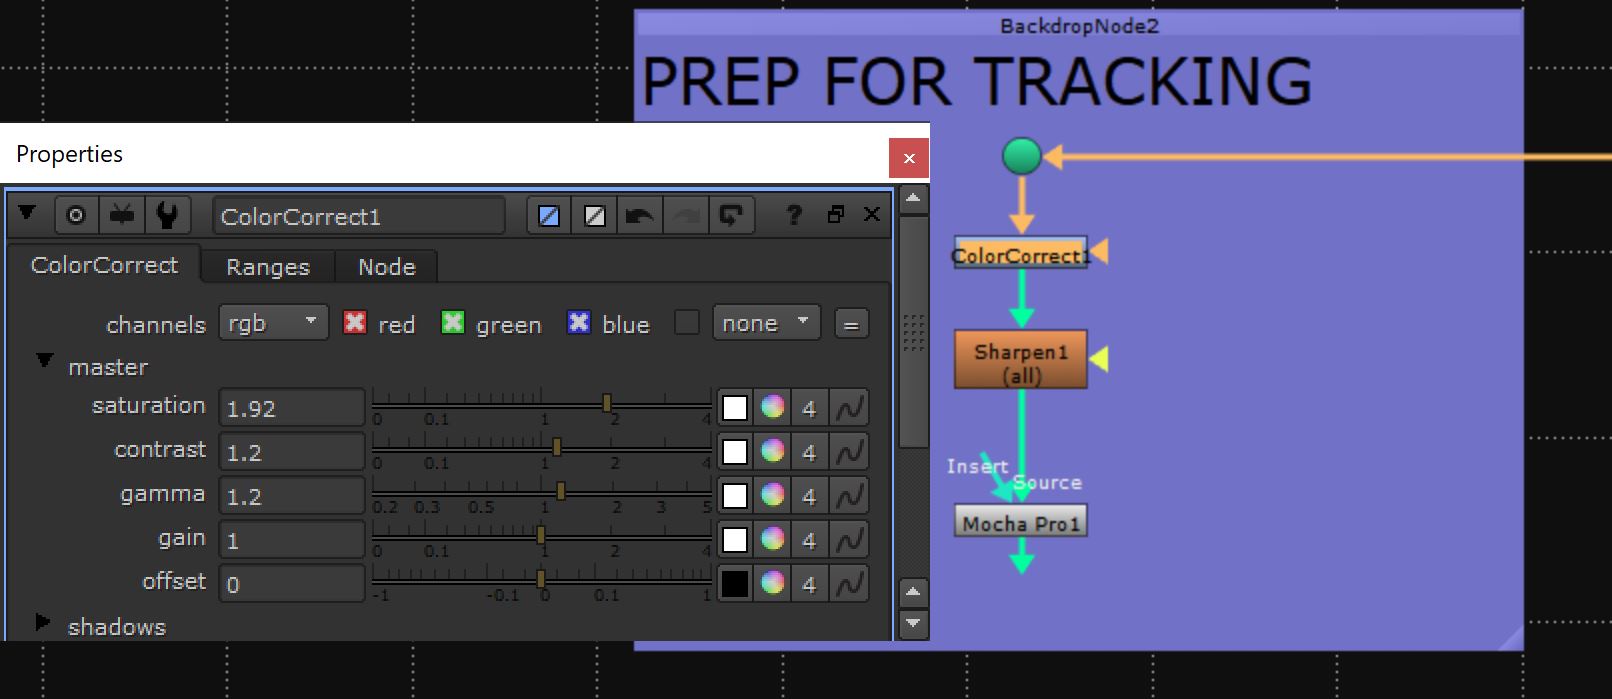
(pic 3)
I will draw I quick shape around X20 sign, select perspective as we have some perspective shifts and hit the track button.

(pic mocha)
Now let’s create a clean patch by frameholding our first frame, painting out the X20 sign and bringing everything back into our main pipe.
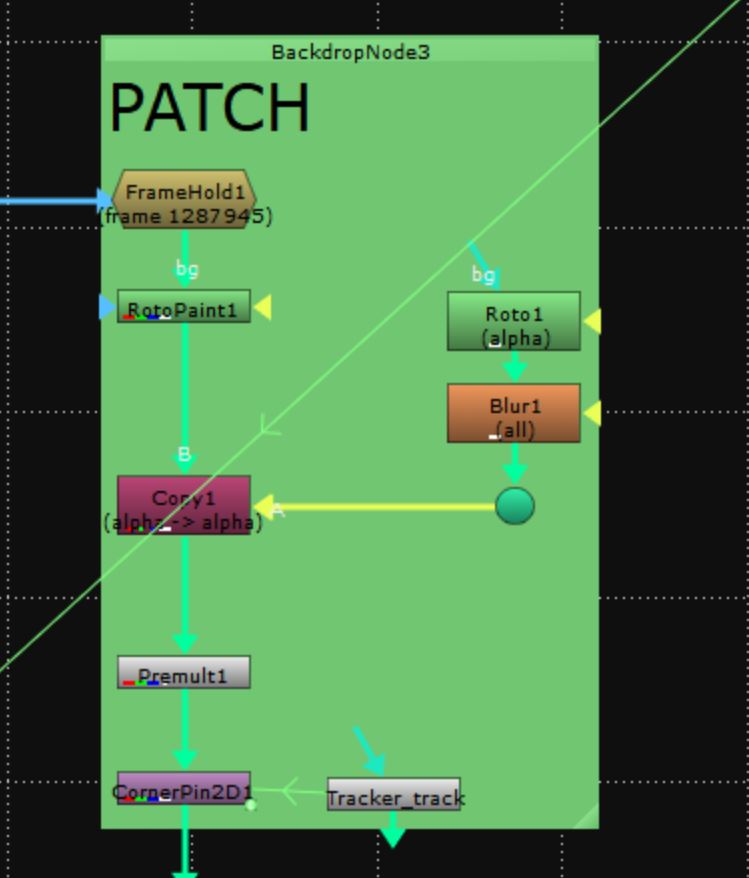
(pic 4)
Great, now let’s bring our original color values back. Just copy grade node that we used to average our color values and active the “reverse” option.
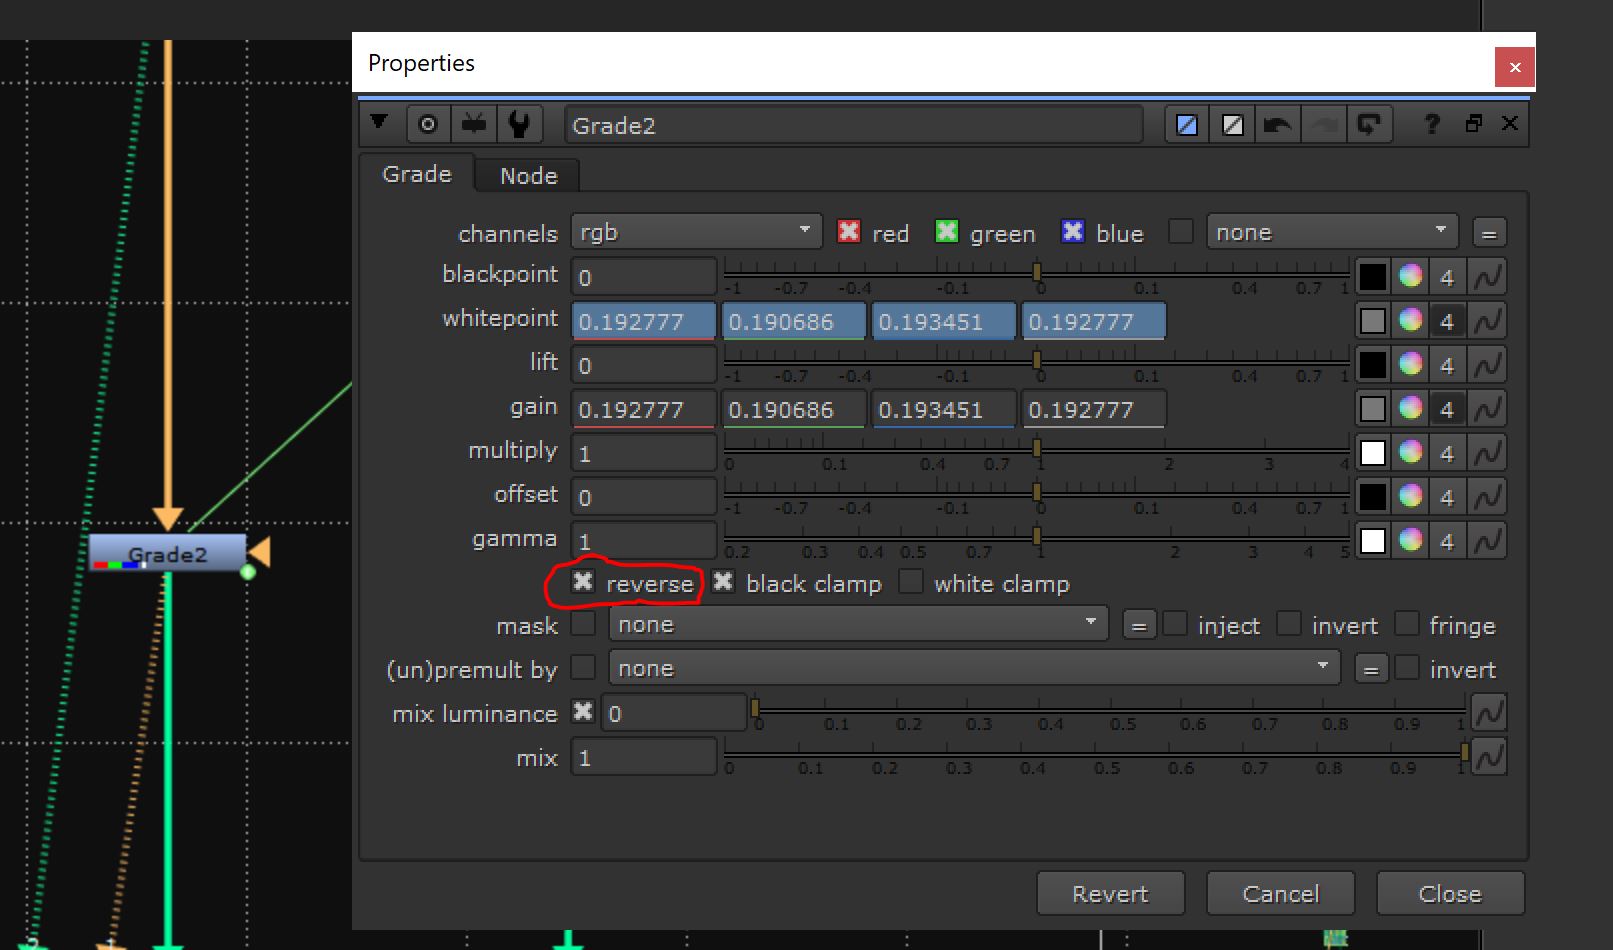
(pic 5)
Now the final step. We need to bring back our original grain as well as we need to re-grain our clean patch. We don’t want to re-grain the whole plate, only the clean patch.
For that we going to use DasGrain gizmo and the difference grain method. This method will let us affect clean patch only without touching the original plate.
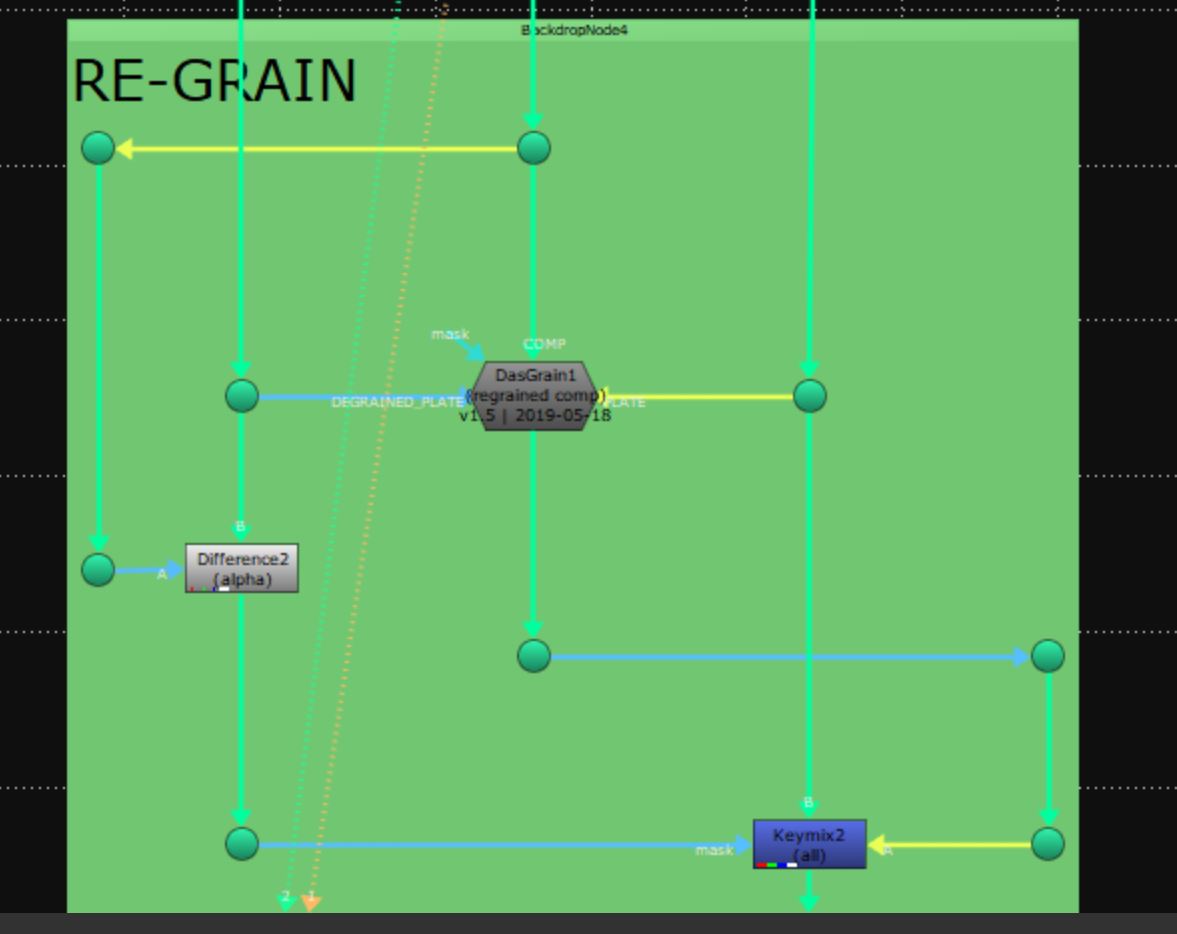
(pic 6)
That’s it. If we compere values of the original plate and out render – they are identical in all places besides our modified area.

If you want to get my difference grain set-up, feel free to grab it here: