Understanding UVMaps - Warping with STMap - Pt. 1
Here at RISE we started using UVMaps to apply camera lens distortion to matte paintings, cg renders and all sorts of footage when there was no (or at least no cheap) way to get the lens distortion value from your favourite 3D tracking application into Nuke. In this first example I'm going to show how to do this - although now there are plenty of ways to get i.e. Syntheyes' or PFtrack's lens distortion values into Nuke - or to use the Nuke tracker right away for undistorting and redistorting.
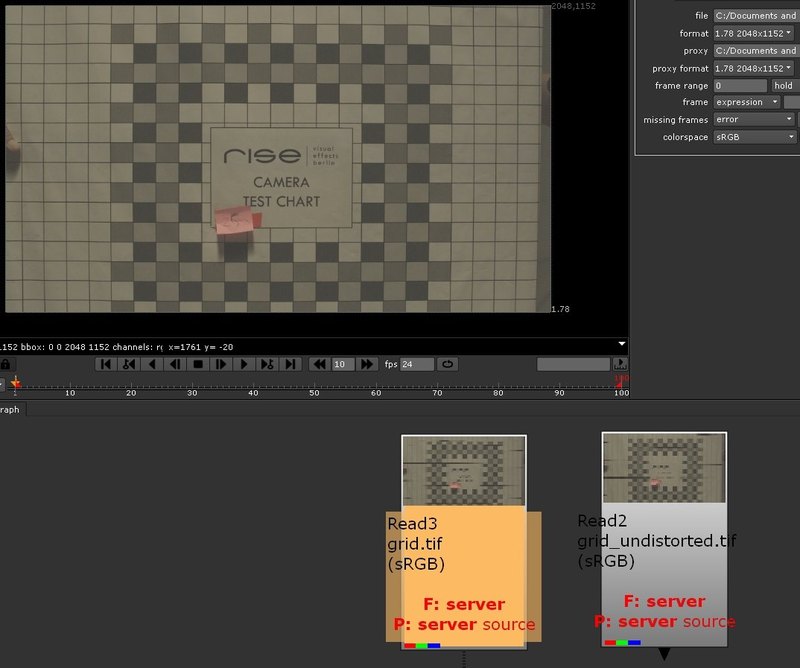
Usually you would start shooting a grid with your lens of choice:
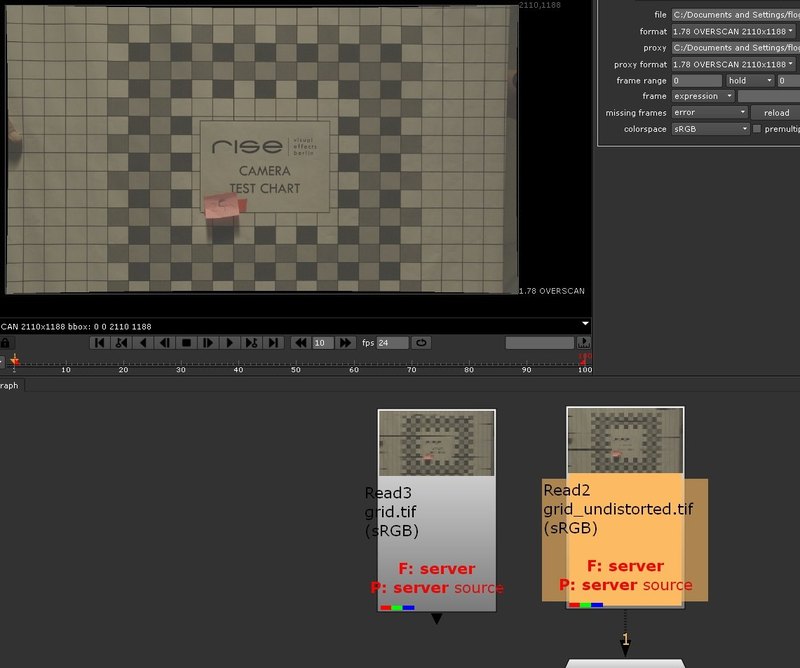
Then you would undistort it using the 3D tracking software (please note the increase of image size due to warping):
You can now use your undistorted footage in your 3D application of choice as background and all track predictions will stick perfectly (as long as your 3D camera's focal length takes the overscan image size into account). Render your CG images with overscan from any application and renderer you want. You can now apply the lens distortion to your renderings using the 3D tracking package.
But - what about Nuke's 3D space? Do I have to scanline render everything with overscan resolution, distort my renderings with the external 3D tracker and then read the image sequence in Nuke again to do my final 2D comp? What about 2 billion exr channels? Is there any 3D tracking software that can distort exr sequences including all channels? I don't think so (correct me if I'm wrong)...
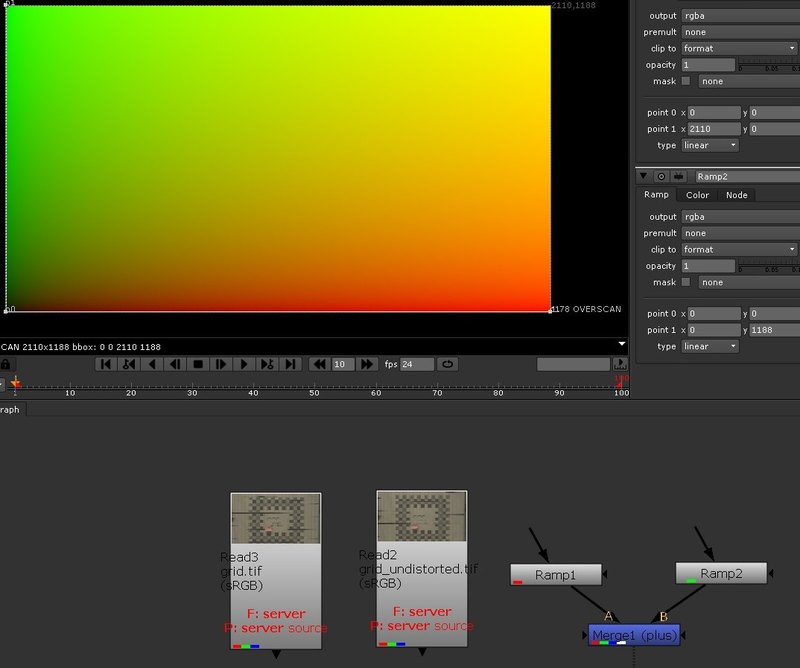
If you want to do proper redistorts in Nuke you should have a pixel accurate warp doing exactly what your 3D tracking package does to your images. Consider this: A standard UVMap has a unique color value or ID for each pixel. If you change something in an image (like redistorting it) you could apply the same transformation to a UVMap and you could then later reconstruct by comparing the pixel color values with the standard UVMap values what has been changed. Here is how to create a standard UVMap with just two linear ramp nodes (same resolution as your undistorted images - so the UVMap has to have an overscan):
Now write the image to disk and re-distort it with your 3D tracking software of choice. It still has overscan resolution but it has been re-distorted:
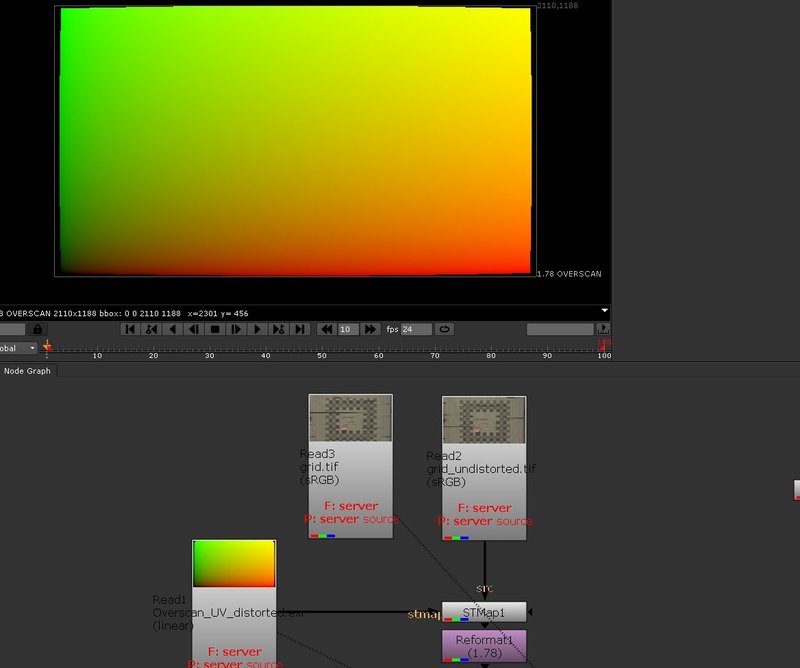
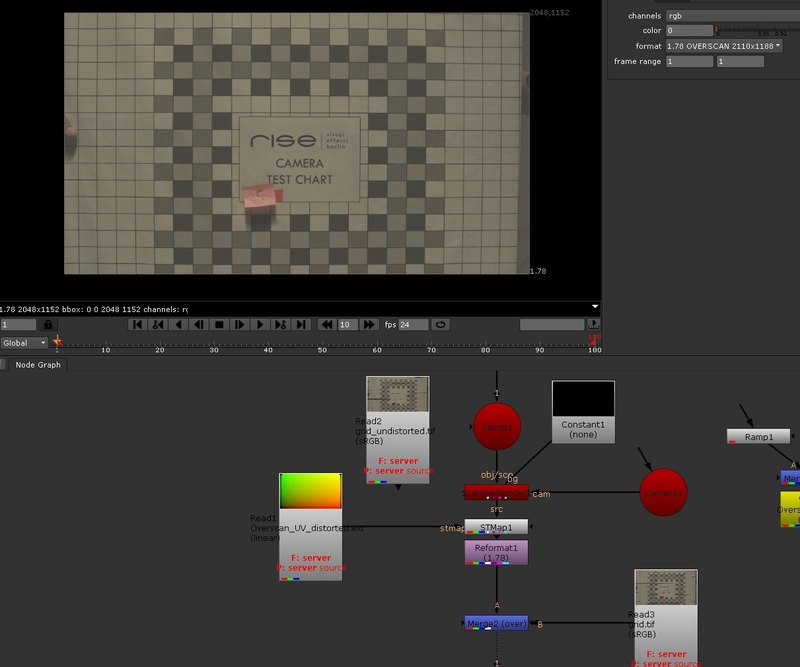
Connect the re-distorted UVMap to the stmap input of the STMap node. The source input of the STMap node will now be transformed in the same way the UVMap was warped by the 3D tracking software. Both inputs have to be of equal resolution, of course. You can then crop the image to your original source resolution:

The lensgrid that was undistorted using the 3D tracking application is now redistorted and croped to match the original lensgrid that was captured on set. If you want to use this technique to distort Nuke's 3D space output from a scanline renderer node to match the distortion of the filmed background plate - just set the background of the scanline renderer to be the same overscan resolution as the undistorted images (with rgba turned off) and apply the correct overscan focal length to the camera in your 3D scene. Then apply the STMap node with your distorted UVMap to warp the output of the scanline renderer.
The next part of this tutorial will cover warping of paint strokes and beziers using projected UVMaps to make color correction on 3D renders a little easier - or to add other fancy stuff that shifts perfectly in perspective with the rest of the scene without being 3D...