The DMP Overscan Prep gizmo is a non-destructive, modular tool designed to streamline the preparation of digital matte paintings (DMPs) and elements for 3D projection. It handles overscan, canvas optimization, and upscaling, while automatically generating the mathematically perfect inverse nodes required to restore your painting to the correct projection space.
DMP_Overscan_Prep
First submitted: 18 June 2026
Author: Rahul Venugopal
Website: http://www.rkvfx.com
Compatible Nuke versions: 12.0 or later
Compatibility: Source
DMP Overscan Prep: User Guide
Here is the step-by-step guide on how to deploy it in a professional pipeline.
Phase 1: Plate Preparation
Connect your camera plate or layout render into the Input of the Gizmo.
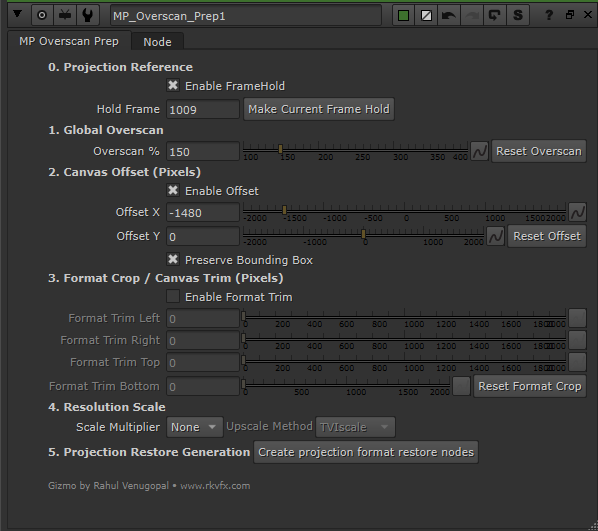
0. Projection Reference Before altering the canvas, you must lock your working frame to match your projection camera.
Enable FrameHold: Check this on to freeze the input.
Make Current Frame Hold: Scrub to your ideal projection frame on the timeline and click this button. It instantly snaps the
Hold Framevalue to your current playhead position.
1. Global Overscan Give yourself room to paint past the edge of the final frame.
Overscan %: Increase this value (e.g., 110% or 120%) to expand the canvas equally in all directions.
Phase 2: Canvas Optimization
If you are painting a localized element (like a specific building in the top right corner), there is no need to process a massive, mostly-empty 8K canvas. These tools let you isolate your working area.
2. Canvas Offset (Pixels)
Enable Offset: Allows you to pan the actual image data within your overscan bounding box.
Offset X / Y: Shift the image so the specific area you need to paint is centered or optimized.
Note: Bounding Box preservation is handled automatically under the hood to ensure you don't lose data outside the active viewer.
3. Format Crop / Canvas Trim (Pixels)
Enable Format Trim: Activates the cropping tool.
Trim L / R / T / B: Shave off dead space from the edges of your canvas. This generates a new, smaller format specifically for your working file, drastically reducing processing time and file size.
Note: The Gizmo automatically applies a
BlackOutsidenode here, ensuring that any negative space created by your offsets or trims is padded with pure black, preventing edge-pixel smearing.
Phase 3: Resolution Scaling
4. Resolution Scale Upscale your prepared canvas for high-fidelity detailing.
Scale Multiplier: Choose between None, 2x, or 4x.
Upscale Method:
TVIscale: Best for edge preservation and preventing filtering artifacts. (Computationally heavier).
Reformat: Standard Nuke scaling. (Lighter and faster, great for less critical scaling or quick iterative tests).
Phase 4: The Export & Restore
Once your canvas is prepped, you are ready to export this frame to Photoshop, or start painting right there in Nuke. But first, you need the nodes to reverse all the math you just applied.
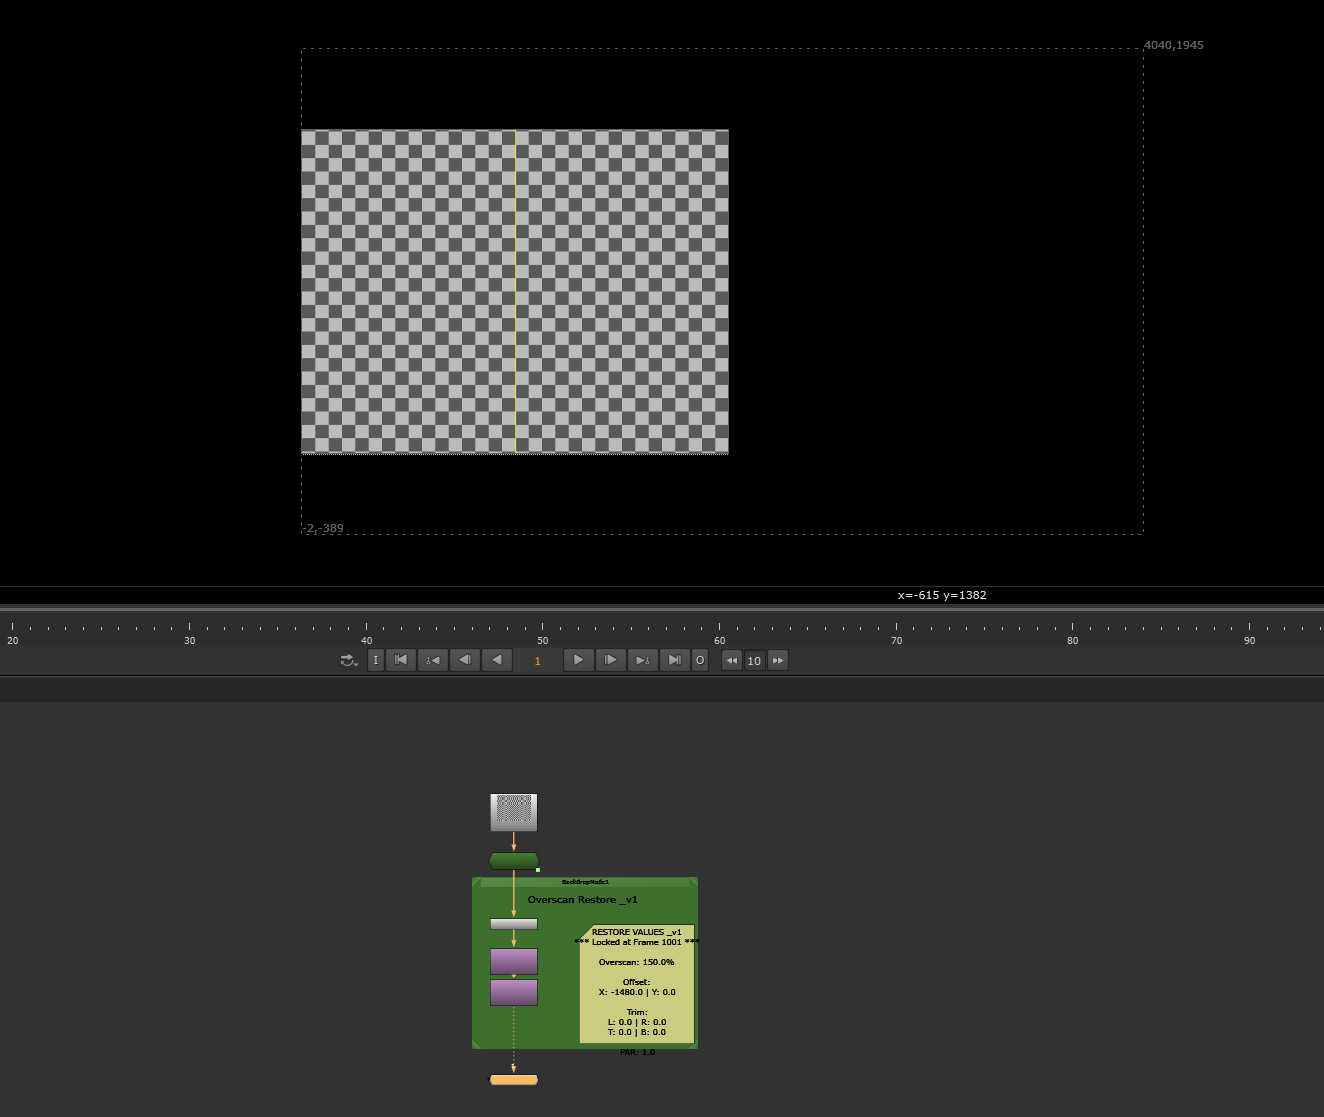
5. Projection Restore Generation Click the "Create projection format restore nodes" button.
The Gizmo will read the input image's Pixel Aspect Ratio (PAR), calculate your overscan, offset, trim, and scale multipliers, and spawn a custom, version-tracked backdrop right next to the Gizmo containing two nodes:
Restore_Transform_DMP: Pushes your modified canvas exactly back into its original relative spatial position.
Restore_Format_DMP: Locks the bounding box and resolution to match the final required projection format, safely injecting the correct Pixel Aspect Ratio.
The Standard Pipeline Loop:
Setup your plate with MP Overscan Prep.
Click Create projection format restore nodes.
Write out the prepped frame and paint your DMP.
Read your finished DMP back into Nuke.
Pipe the DMP through the generated Restore nodes.
Plug the output directly into your
Project3Dnode. Everything will line up perfectly.
or register to download or rate.
Comments